
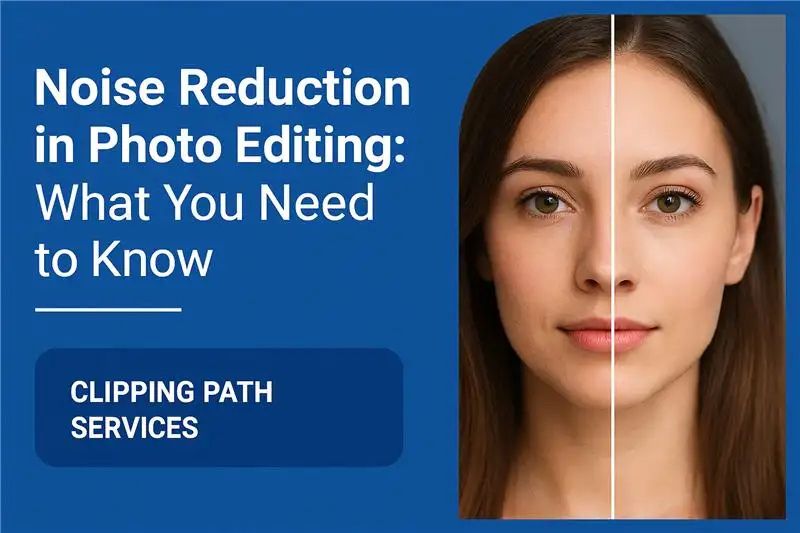
Although digital photography has advanced significantly, image noise is still a common issue for photographers, even with the best cameras.Those small spots of grains or color deformities can otherwise ruin the correct shot. This is the place where noise reduction in photo editing becomes necessary. Whether you are editing portraits, landscape, or product photos for ecommerce, noise reduction ensures clean, professional results.
In this guide, we will explain what the noise is, why noise lacks, how to use it effectively, and why it plays an important role in clipping path services and overall image editing workflows.
1. What Is Noise in Photography?
The noise in digital images refers to random adaptations in brightness or color that appear in the form of unwanted grains, spots or spots. This usually happens when:
- Shooting in low light conditions
- Using high ISO settings
- Taking long-exposure shots
- Working with small image sensors
There are two main types of noise:
- Luminance Noise: Appears as a grainy texture in the brightness of an image.
- Color (Chroma) Noise: Shows up as random red, blue, or green color specks.
Both types reduce the quality of your images and can make them appear less sharp and less professional. That’s why noise reduction in photo editing is such an important step.
2. What Is Noise Reduction in Photo Editing?
Noise reduction is the process of reducing or eliminating unnecessary noise in photographs while preserving important details. Algorithms are used in contemporary editing software to detect and smooth out pixel variations.
The objective is balance: reduce noise without over-signs the photo. Excessive reduction can blur the details and make the subject look unnatural, while very few leaves are visible to disturbing grains.
3. Why Is Noise Reduction Important?
The reduction in noise in the production of high quality scenes plays an important role. here’s why:
- Increases clarity: Clean pictures look sharp and more professional.
- Protects the details: properly applied, the noise reduction maintains a fine texture without blurring.
- Product improves presentation: In ecommerce, product images should look innocent. Before applying clipping path services to separate objects, it is best to reduce noise for smooth, accurate results.
- Professional finish: noise-free pictures stand in portfolio, marketing materials and online platforms.
4. When Should You Apply Noise Reduction?
In photo editing, the workflow order matters. After basic adjustment (such as exposure and white balance), noise reduction should be applied but before sharp.
If you speed up first, you risk increasing the noise. By reducing the noise quickly, you create a cleaner base to work. This makes clipping path services more efficient, as it is easy to choose and refine smooth edges.
5. Techniques of Noise Reduction
When editing photos, there are a number of ways to reduce noise:
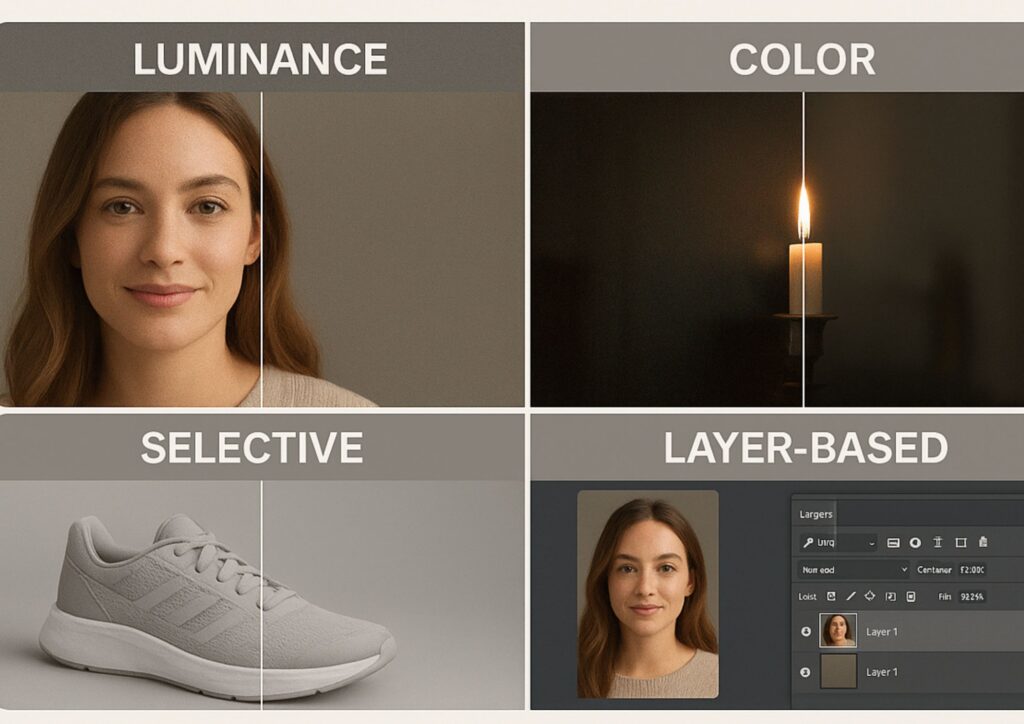
5.1 Reduction of Luminance Noise
This technique preserves textures while reducing brightness fluctuations. It lessens the graininess without detracting from the organic appearance of materials like fabric or skin.
5.2 Reduction of Color Noise
By eliminating arbitrary color specks that frequently show up in low-light or high-ISO photos, this focuses on chroma noise.
5.3 Reduction of Selective Noise
You can apply noise reduction to particular regions of the image (such as backgrounds or shadows) rather than the entire image. Because it maintains details on the main subject while keeping edges clean, this is particularly helpful prior to using clipping path services.
5.4 Noise Reduction Using Layers
Expert editors frequently apply various noise reduction settings to distinct layers and duplicate layers. This allows you greater control and avoids overprocessing.
6. Step-by-Step Noise Reduction Workflow
Here’s a practical workflow you can follow:
- Shoot in RAW format – This gives you more flexibility to correct noise in post-production.
- Do basic adjustments first – Prior to dealing with noise, adjust contrast, exposure, and white balance.
- Apply luminance reduction – Start with a moderate adjustment until the grain looks smooth but not plastic.
- Apply color noise reduction – Remove color speckles without dulling the overall tones.
- Use selective brushes or masks – Apply noise reduction only where needed, such as dark areas or flat backgrounds.
- Sharpen the image – Apply sharpening after noise reduction to bring back crispness.
- Perform clipping path services or masking – With clean edges and smoother surfaces, object isolation becomes faster and more accurate.
7. Common Mistakes to Avoid
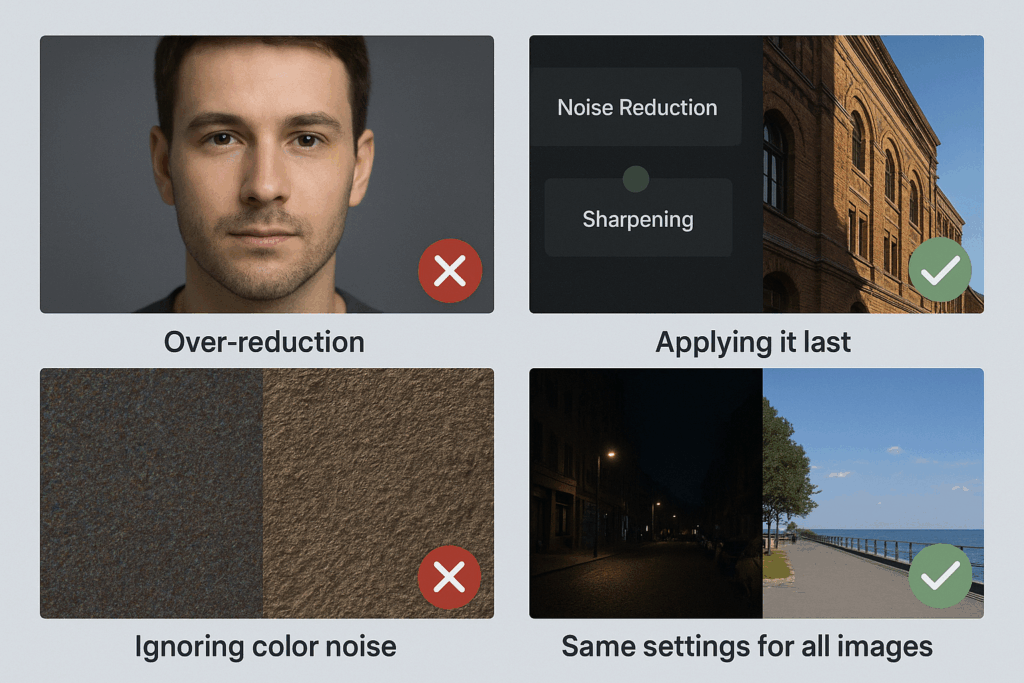
- Over-reduction: Too much noise reduction makes photos look artificial or blurred.
- Applying it last: Waiting until after sharpening exaggerates noise and makes it harder to fix.
- Ignoring color noise: Many beginners focus only on luminance noise and forget about chroma speckles.
- Using the same settings for every image: Different photos require different levels of adjustment depending on ISO and lighting.
8. Role of Noise Reduction in Clipping Path Services
Noise reduction and clipping path services go hand-in-hand in professional image editing. Here’s why:
- Cleaner edges: Noise around edges can interfere with creating precise clipping paths. Smoother backgrounds make path creation easier.
- Faster workflow: Editors spend less time fixing rough or noisy selections.
- Professional output: Final cutouts look more polished, whether for eCommerce, catalogs, or advertising.
- Consistency: In bulk editing projects, noise reduction ensures all images look uniform, which improves the effectiveness of clipping path services.
9. Professional Tips for Better Noise Reduction
- Zoom in to 100% while editing to check details.
- Avoid sacrificing textures for smoothness; instead, strike a balance between reduction and sharpness.
- Apply custom settings depending on the subject and background.
- Check both shadows and highlights – noise often hides in darker areas but can also affect bright tones.
- Use batch editing for large projects – especially useful when working with hundreds of product images needing clipping paths and retouching.
10. Final Thoughts
In photo editing, noise reduction is more than just a technical step; it’s crucial to producing professional, high-quality images. Applying noise reduction carefully allows you to:
- Boost sharpness and clarity
- Eliminate distracting color specks and grain.
- Boost clipping path services’ accuracy
- Make sure your photos are prepared for use in marketing, eCommerce, or your portfolio.
To put it briefly, becoming proficient in noise reduction enables you to produce clear, intricate, and polished images. It ensures faultless image presentation that draws attention and fosters trust when paired with accurate clipping path services.
FAQ’s
The noise decrease is the process of reducing unwanted grains, spots or color deformities in an image. It helps produce cleaner, sharper and more professional looking photos.
The image noise usually appears when shooting in low light, using high ISO settings, or takes exposure shots for a long time. Small camera sensors also produce more noise.
Not always. While editing software can significantly reduce the noise, the removal of it completely can also make significant details blurred. The goal is to reduce the noise by keeping the texture natural.
The reduction in noise should be applied before accelerating. If you speed up first, you risk increasing the noise, making it more difficult to remove.
Clean, noise-free pictures make it easy to create accurate clipping paths. The smooth background allows editors to more accurately separate the objects, save time and improve the final output quality.
Start with a decrease in luminance noise to reduce grains, then apply color noise decrease to fix random colored speckles.