In a digital-first marketplace, your product photos are the silent salespeople for your business. They narrate your brand’s story, demonstrate product quality, and help shoppers decide if they want to click “Buy Now” or continue scrolling. The problem is that no matter how wonderful your product is, poorly edited photos can instantly kill its appeal.
Editing product photos isn’t just about enhancing colors or brightness. Editing is creating visual content that captures attention, builds trust, and converts browsers into buyers. When selling on any e-commerce platform (Amazon, Shopify, or your own e-commerce website), understanding how to edit photos and use clipping path services to your advantage can turn mediocre product photos into an effective selling tool.
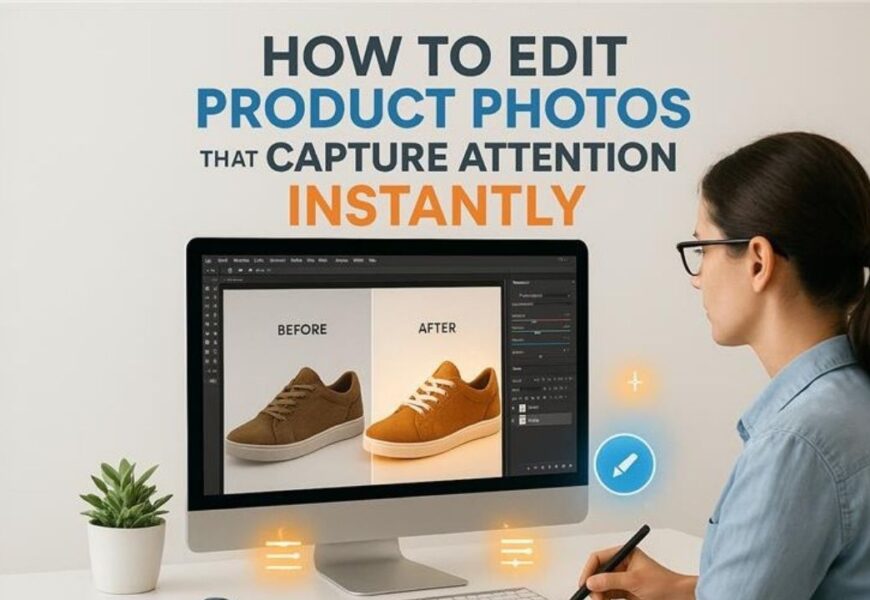
In this post, we will explore the whole photo editing process to make your product photos effective. They capture attention and convert browsers into buyers.
Why Product Photo Editing Matters More Than Ever
First thing’s first, we need to make sure you understand why editing is important.
That’s because online shoppers can’t touch or feel your product. All they have is what they see on their computer or phone. Because of this, visuals are huge in the decision-making process. Studies show that 93% of consumers say the most important factor in deciding whether or not to purchase a product online is visual appearance.
Having a professional photo editor means that:
- Your products look consistent and professional on every listing.
- Your backgrounds are clean, neat, and without distractions.
- Your lighting, shadows, and colors accurately reflect your product.
Your brand has a consistent and beautiful look and feel. And one of the most effective ways to accomplish all of this is with clipping path services–or image editing, which allows precise background removal and a cleaner, sharper image.
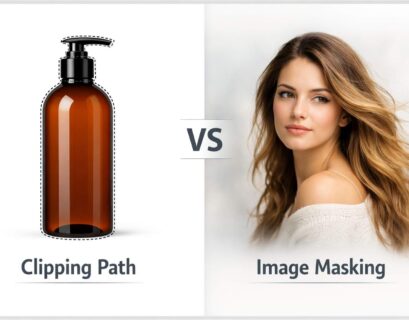
What Are Clipping Path Services and Why Are They Important?
Have you ever wondered what the secret is to making perfect white background pictures for a product on an e-commerce store? The answer is, most of the time, clipping path services.
A “clipping path” is a method used in photo editing software (like Adobe Photoshop) to outline an object with the Pen Tool. If something is within the path, it will stay. If it is outside the path, you will be able to delete or replace it.
Here are some reasons why clipping path services are essential for product photo editing:
- Removing Background: Make it easy to replace or remove a messy background.
- Creating Product Focus: Remove all distractions so the product stands out.
- Consistency: Hold the same background and style throughout your listings.
- Usability: Share the same image across multiple platforms from website to social media.
For instance, if you’re selling shoes, jewelry, or electronics, utilizing clipping path services will give a clean isolation of each item, and make every detail pop on the background.
Preparing the Image: Start with Quality Photography
Start the editing process with the right building blocks—good lighting, clear focus, and proper composition—since without those, no amount of editing software can save a poorly shot image.
Helpful Tips for Great Product Photography:
- Use soft, diffused lighting. You want to avoid harsh shadows.
- Take lots of angles: front, back, side, and close-up.
- Use a tripod so your camera is stable.
- Clean your product and make sure it’s dust-free before shooting.
When you shoot images that are clean and high-resolution, the editing process is easy and creates results you can call ‘natural’!
Step-by-Step Process to Edit Product Photos
Now that your images are ready, let’s go step by step through the editing process to make them eye-catching and professional.
Step 1: Remove or Replace Backgrounds
Background removal is often the first step in editing product photos. This is where clipping path services come into play.
A clean, white background is ideal for e-commerce platforms like Amazon or eBay because it highlights your product and maintains consistency. But depending on your brand, you can also experiment with light gradients or lifestyle backgrounds that fit your aesthetic.
Professional clipping paths ensure the background removal looks clean — especially around tricky edges like hair, fur, or transparent materials.
Step 2: Adjust Lighting and Exposure
Whether through lighting or the enhancement of good photography, you will often have to adjust the lighting. You can use one of the two photo editing programs to:
1. Slightly increase the exposure to brighten the image and make sure it is clear;
2. Adjust the highlights and shadows to add depth;
3. Maintain natural contrast so you do not have a totally edited look to everything.
Also, do not forget that good lighting is a key component in connecting with emotion. A bright product looks inviting, trustworthy and ready to purchase.
Step 3: Enhance Colors and White Balance
Colors have an effect on feelings. You want your product to look bright and real, not dull or oversaturated. Also adjust your white balance for real color! For example, you do not want a product in red to appear orange or yellow from lighting changes. Also, adjust saturation and vibrance to make photos look real. Often, when editing in bulk, professional photo editors will use color corrections, often in combination with service clip path services, to ensure color proofing across an entire catalog.
Step 4: Refine Edges and Shadows
Adding realistic shadows contributes depth to your product and makes it feel more rooted in the scene. Without shadows, your product may feel like it is floating without any real dimension.
There are two types of shadows you would refer to that you can add:
- Drop Shadows: To create a little bit of subtle depth.
- Natural Shadows: To maintain the real feel of your image.
If done correctly — usually done circle the time to apply a clipping path, these effects only help add to the realism and have visual value!
Step 5: Retouch Imperfections
Even a quality camera can end up recording dust, scratches or reflection spots. Use the Healing Brush or Clone Stamp tools to remove those distractions.For clothing products, this can mean ironing out the wrinkles; for jewelry, it can mean eliminating reflections; and for electronics, it means removing fingerprints.
Taking that extra step in retouching adds credibility to your listing – because a clean, polished image of a product implies quality.
Step 6: Resize and Optimize for Web
Large, high-resolution images may be stunning; however, they can slow down website load times. After editing your images, always resize and compress them to be used online.
Use file formats such as JPEG or WebP to quality and have manageable file lengths. This ensures loading speeds are quick and you also have better SEO performance.
The Role of Professional Clipping Path Services
Although this can be done manually, it can be tedious, particularly if there are hundreds of product photos to manage. For this reason, many companies use professional clipping path services.
Benefits of Outsourcing Clipping Path Services:
- Accuracy: Experienced editors will provide pixel perfect outlines.
- Speed: Bulk image editing is provided quickly.
- Consistency: All product images will have a consistent look.
- Cost Effective: Outsourcing saves time and internal resources.
Professional editors are trained to use the most advanced software tools available, and the right amount of manual touch to ensure that every product looks immaculate, whether they can be viewed on an online marketplace or in a print catalog.
Advanced Editing Techniques to Capture Attention
Once you’ve mastered the basics, you can use creative techniques to make your product photos even more engaging.
a. Add Reflections for a Modern Touch
After learning the foundational techniques, you can employ creative methods to produce engaging product photos.
b. Use Transparent Backgrounds for Flexibility
Reflections work wonderfully for products such as watches, perfume or gadgets which add an elegant dimension.
c. Highlight Product Features
Use subtle vignettes or contrast adjustments to draw the viewer’s eye toward the most important parts of the product.
d. Create Lifestyle Mockups
After professionally clipping the product do take it out and redefine it in the real-life setting; for example a watch on the wrist or a lamp on a table; and create an emotional demand.

Common Mistakes to Avoid When Editing Product Photos
Even with the most effective equipment, even small mistakes can dilute your product’s effectiveness. Look out for these common mistakes:
- Badly over-saturated colors that simply don’t look realistic.
- Inconsistent lighting between your product images.
- Not appropriately aligning or cropping images.
- Adding shadows and reflections that are unrealistic.
- Saving your image files in lower resolution.
All of these mistakes can decrease your professionalism and confuse your customers.
Why Consistency Is the Secret Ingredient
Editing is more than just aiming for perfection, it is consistency. Your product catalog should all have a similar look, representing your branding. Consistency in the background, lighting, or tone increases trust and builds recognition. That’s why professional clipping path services are so important — to ensure every image is edited to the same standard and visual flow.
Tools and Software You Can Use
If you plan on doing some of your own editing of product images here are some tools to consider:
- Adobe Photoshop: The industry standard for clipping paths, retouching, and color correction.
- Lightroom: Great for color and exposure corrections in larger quantities.
- Canva & Pixlr: Great for simple touch ups and marketing materials.
- Remove.bg: Hectic free background removal option (not as accurate as a clipping path).
In saying that, if you want to maintain high-level professional photos, you are better off outsourcing the editing since you are busy with running an e-commerce business.
Final Thoughts: Turning Photos into Profits
When selling online, your product photos are the faces of your brand. One beautifully edited photo can mean the difference between a customer skimming past your listing or clicking “Add to Cart.” Investing in professional editing — mainly clipping path editing — can cause your products to truly stand out, with crisp details, improved focus, and a photograph that really sells.
When your product photos are maximizing attention, they are doing more than looking pretty – they are selling more. And in the competitive world of e-commerce, that’s what really matters.