How To Create a Clipping Path in Illustrator: A Complete Guide for Designers and Marketers
Whether you’re a seasoned designer or a curious beginner, learning how to create a clipping path in Illustrator can open up new doors in the world of image editing and design. A clipping path helps you isolate and manipulate specific parts of an image, making it an essential skill in graphic design, eCommerce, advertising, and print media. In this comprehensive guide, we’ll break down everything you need to know to confidently use clipping paths in Illustrator, while also exploring how it differs from similar techniques in Photoshop and InDesign.
Primary focus: We’ll also highlight when to use a clipping path service, and how Illustrator stands out as a tool for this type of vector-based editing.
📌 What is a Clipping Path in Illustrator?
A clipping path in Adobe Illustrator is a vector path that defines the visible boundaries of an object or group of objects. Everything inside the path is visible, and anything outside becomes hidden — but not deleted. It’s a non-destructive way to mask parts of your artwork.
In Illustrator, this technique is known as a Clipping Mask, and it’s one of the most powerful features for design professionals who want to manipulate complex images without affecting the original file integrity.
Think of it as a digital cookie-cutter — it “clips” your image into a desired shape or frame.
🛠 Why Use a Clipping Path in Illustrator?
Designers often use clipping paths in Illustrator for:
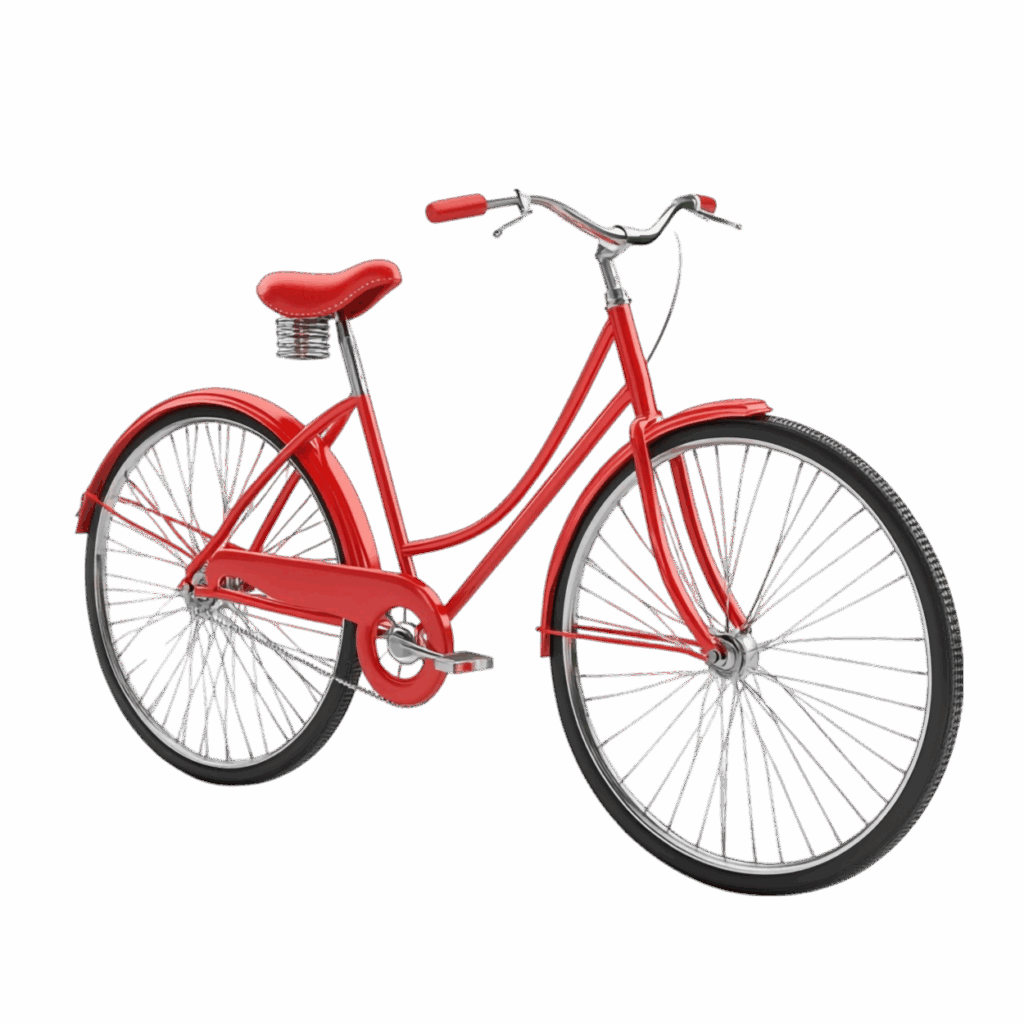
- Creating clean product images for eCommerce
- Designing custom-shaped logos or icons
- Wrapping text or images into shapes
- Preparing print-ready layouts
- Creating mockups for packaging, branding, and marketing materials
Unlike Photoshop, which works pixel-by-pixel, Illustrator uses vector graphics, making it perfect for scalable, high-resolution design work — a major reason why many professionals choose to create clipping path Illustrator workflows over raster-based methods.
🔍 Clipping Path vs. Clipping Mask vs. Image Masking
While often used interchangeably, these terms aren’t always the same:
| Technique | Software | Description |
|---|---|---|
| Clipping Path | Illustrator/Photoshop | A vector shape used to hide parts of an image |
| Clipping Mask | Illustrator | A group of layers clipped into a shape or vector object |
| Image Masking | Photoshop | Pixel-based masking using brushes, gradients, or selections |
Illustrator’s vector-based clipping mask is technically what most people mean when they talk about a clipping path Illustrator method.
🧩 Step-by-Step: How To Make a Clipping Path in Illustrator
Let’s walk through the complete process of how to create a clipping path in Illustrator.
1. Open Your Image or Vector File
- Launch Adobe Illustrator.
- Open the project or drag your image onto the artboard.
- Ensure your image is either embedded or linked properly.
2. Create the Path You Want to Use for Clipping
- Use the Pen Tool (P), Ellipse Tool (L), Rectangle Tool (M) or any shape tool to draw your desired path.
- This vector shape will act as the “clipping path” or mask.
Tip: The shape you draw should be positioned above the image or object you want to mask.
3. Select Both Objects
- Hold Shift and click on both the image and the vector path.
- The shape must always be on top, otherwise, the clipping won’t work.
4. Apply Clipping Mask
- Navigate to the top menu and go to:
Object > Clipping Mask > Make
or simply use the shortcut Ctrl+7 (Windows) / Cmd+7 (Mac).
Voilà! Your image is now clipped within the shape.
✏️ Editing a Clipping Path
Need to tweak the path later?
- Direct Selection Tool (A) allows you to adjust the anchor points of the clipping shape.
- To remove the clipping path, go to:
Object > Clipping Mask > Release - Once released, you can re-edit or change the shape or content underneath.
This non-destructive editing is what makes Illustrator a favorite tool among best clipping path service providers.
💡 Pro Tips: How to Create More Advanced Clipping Paths
1. Multiple Objects Clipping
- Group the items you want to clip:
Object > Group or Cmd/Ctrl + G - Draw your path on top.
- Select all and apply clipping.
2. Opacity Masks for Transparency Effects
- Combine clipping masks with opacity masks for gradient-fade effects.
- More suitable for advanced branding or print layouts.
3. Nested Clipping Masks
- You can create clipping masks inside other clipping groups for layered effects.
- Useful for creating complex product mockups or social media graphics.
🧠 Clipping Path Illustrator vs Photoshop vs InDesign
| Feature | Illustrator | Photoshop | InDesign |
|---|---|---|---|
| Editing Type | Vector-based | Pixel-based | Layout-focused |
| Clipping Path | Yes | Yes (Path Panel) | Limited |
| Best Use | Logos, Products | Complex Photo Edits | Print Layouts |
So, while you can create a clipping path in Photoshop, Illustrator gives you more flexibility with vectors and complex paths, and clipping path InDesign is generally limited to layout masks for print publications.
🧳 When to Use a Professional Clipping Path Service?
While Adobe Illustrator provides powerful tools for manual clipping, there are times when outsourcing to the best clipping path service can save you time and guarantee accuracy — especially in bulk projects.
Consider outsourcing if:
- You run an eCommerce store with thousands of SKUs
- You need precise background removal for products
- You’re under tight deadlines for catalog or banner design
- You need consistent results across hundreds of files
Clipping path professionals use Illustrator, Photoshop, and other tools to deliver clean and accurate results, particularly when dealing with images that have complex edges like hair, fur, or jewelry.
💼 Real-World Use Cases
🛍 eCommerce
High-converting product images with pure white backgrounds using Illustrator clipping paths.
📖 Publishing
Authors and layout designers use clipping masks in InDesign and Illustrator to embed artwork within chapter borders or illustrations.
🖼 Advertising & Print
Billboards, flyers, packaging, and brochures often use complex clipping paths for stylized visuals.
🎨 Creative Agencies
Marketing campaigns with layered artwork, silhouettes, and mockups built through advanced clipping path Illustrator workflows.
📚 Final Thoughts
Learning how to make a clipping path in Illustrator is not just a technical skill — it’s a creative superpower. Whether you’re designing for print, web, or social media, mastering this technique allows you to present your visuals in the most professional and polished way.
And if you’re scaling your design operations or simply want pixel-perfect edits, don’t hesitate to consider the best clipping path service to handle repetitive or complex image editing tasks.
🔑 Key Takeaways
- Clipping paths in Illustrator allow for clean, scalable, and editable image masking.
- The process involves placing a vector shape above the image and using Object > Clipping Mask > Make.
- Ideal for product design, branding, packaging, and advertising visuals.
- You can always refine the path using the Direct Selection Tool.
- Outsourcing to professional clipping path services is beneficial for high-volume or precision-demanding projects.
- Illustrator offers more advanced vector-based control compared to clipping path in Photoshop or InDesign.
🔍 Suggested FAQs for SEO
Yes, but Illustrator uses vector-based clipping masks which offer more scalable and flexible design control.
Convert text to outlines (Type > Create Outlines), then use it as a clipping mask over your image or graphic.
Yes, select the image and shape, then press Ctrl+7 (Windows) or Cmd+7 (Mac).
Yes, but it will rasterize the vector, so precision might be lost. It’s best to finish vector edits before exporting.