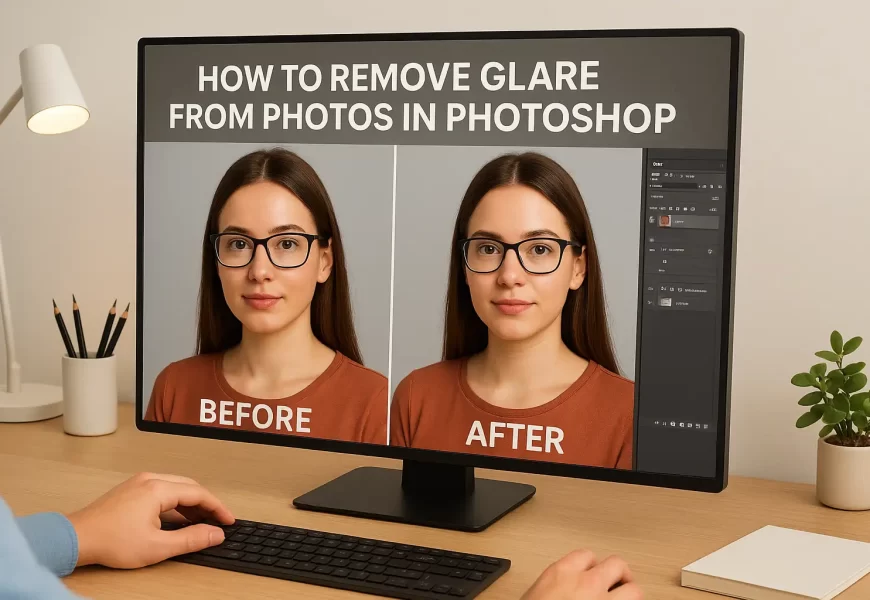
We’ve all encountered this issue: you take what you believe is the perfect photo, but when you view it on your computer, a glaring bright spot prevents the rest of the photo from being enjoyable. Perhaps it is a glare from eyeglasses, shiny skin, a reflective surface, or glitter bouncing off a product. While glare draws viewer attention away from people in the photo or makes faces unnatural, important details can entirely be obscured from glare.
But there is good news! With Adobe Photoshop, glare can be removed to present photographs in their natural beauty. Whether it be a portrait, product photography, or real estate photography, understanding the process of reducing glare is key to every photographer or editor’s skill set. Additionally, professionals with hundreds of images to edit in batches or others looking to maintain consistency or cleanup, outsourced clipping path services might be able to help complete the work efficiently in a shorter amount of time with good results that will be cleaner than the originals.
Well, let’s get started learning how to remove glare from photography step by step in Photoshop, providing you with practical techniques you can – and should – apply in your work immediately.
What Causes Glare in Photos?
Before editing, it’s helpful to know what causes glare in the first place.
Glare typically happens when light reflects off a shiny or smooth surface like skin, glass, metal or water and the glare is hitting the camera lens head-on. This results in a bright patch, often colorless, that obscures important detail beneath it, and often has to be removed by editing or a professional clipping path service in order to regain the original look of the image.
Here are some common causes:
- Using flash indoors or near reflective objects right away before getting into the location
- Shooting outdoors in direct sunlight without a diffuser
- Light reflecting off glasses or any shiny surface
- Highlights blowing out due to camera settings
Understanding what causes glare can help you avoid it during the shoot, but sometimes it’s unavoidable, which is where photoshop comes in.
Step 1: Start with a Duplicate Layer
Whenever you are editing a photo in Photoshop, it is good practice to start by duplicating the original photo. This is an excellent practice because it allows you to work non-destructively and always have the option to revert as you have not lost the original data or details.
Here is how:
- Open your image in Photoshop.
- Press Ctrl + J (Windows) or Cmd + J (Mac), which will make a duplicate of the background layer.
- You will want to rename the new layer something like “Glare Fix” to keep it organized.
By working in a duplicate layer, you as the editor can be assured that the file remains untouched while you try different methods at removing glare.
Step 2: Implement the Patch Tool for Simple Glare
The Patch Tool is ideal for single glare spots, where you have a small area of glare on the person’s face — on the cheeks, forehead, or product edges. With this tool, you are able to take the glare area and replace it with a texture from another area in the photo that is clean.
To use it, you’ll do the following:
1. Select the Patch Tool from the menu in the tools section
2. Draw around the glare spot
3. Drag the selection to an area that is clean and gives a texture that is similar in tone
4. Release mouse and it will blend in automatically
You could further refine it by slightly changing the opacity layer and/or the fade option to match tones more effectively.
Step 3: Try the Clone Stamp Tool for Detailed Areas
For textured surfaces, such as hair, fabric, or wood, the Clone Stamp Tool provides specific control. This tool allows the user to sample nearby pixels and then gently paint them over the glare while keeping the natural texture pattern.
For use:
- Choose the Clone Stamp Tool (S).
- Holding Alt (Option), sample a clean area next to the glare by clicking once.
- Carefully brush over the bright patch.
- Adjust both brush hardness and opacity to blend in with the surrounding area.
For best results, be sure to zoom in and take your time. The key is to work slowly, so the blending looks natural while repairing the glare.
Step 4: Reduce Shine on Skin with the Brush and Healing Tools
Skin glare is one of the most frequent issues with portraits. It may be caused by flash reflections or oily skin, but luckily Photoshop allows you to tone down glare without losing the natural texture.
This is a simple trick:
- Make a new blank layer.
- Use the Brush Tool (B) and select a soft round brush.
- Option + click (Mac) or Alt + click (PC) a nearby skin tone.
- Adjust brush opacity to around 10-15%
- Paint gently over the glare area to soften it.
Another option is using the Healing Brush Tool, which allows you to match tones naturally. The Healing Brush Tool samples nearby pixels automatically and addresses the brightness differences from the glare.
Step 5: Use the Dodge and Burn Technique for Final Touches
When the glare is primarily gone, you may see some lighting inconsistencies or slight flatness to your image. This is where Dodge and Burn comes into play. Dodge and Burn allows for highlights and shadows to be controlled to develop some depth and balance for the image.
How it works:
- Create a new layer set to Overlay.
- Fill the layer with 50% gray.
- Use a soft white brush to dodge, or lighten dark areas.
- Use a black brush to burn, or darken overly bright areas.
This technique helps keep the image grounded in reality, and polishes the image up for final output. This technique is all about subtlety; small amounts add up to a big adjustment.
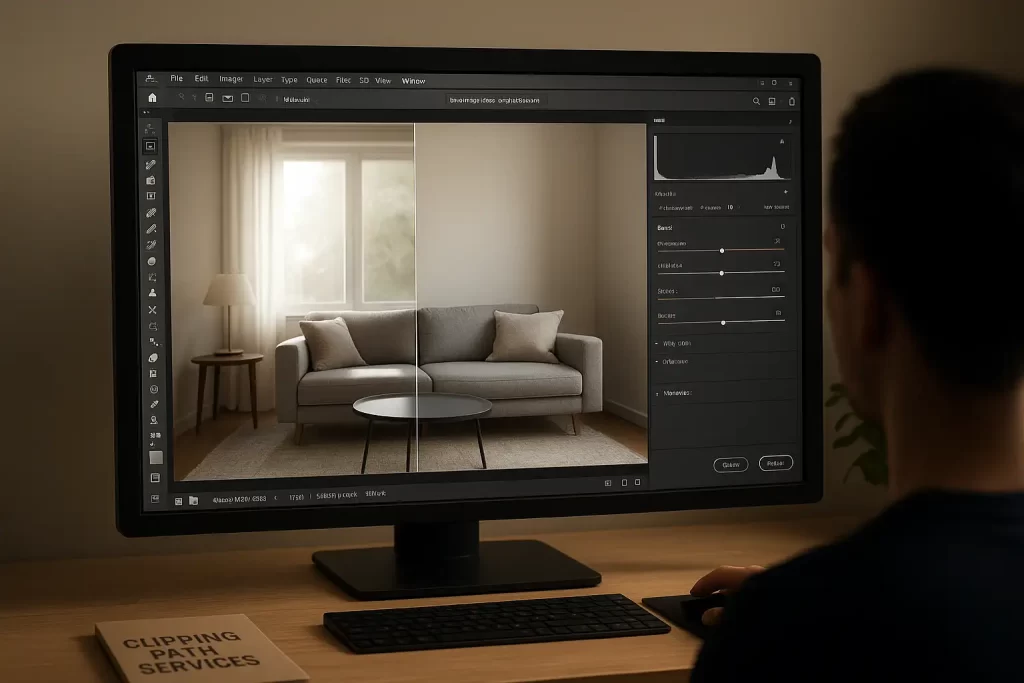
Extra Tip: Adjust Highlights Using Camera Raw Filter
When working with a RAW file or high-resolution image, the best way to fix glare is with the Camera Raw Filter within Photoshop. Using the Camera Raw Filter provides the most control over light, tone, and color on a global level, which is really the purpose of utilizing this, so that you can make any fine adjustments with brightness/exposure across the entire photo.
To begin, use the Filter menu to choose the Camera Raw Filter, then navigate to the Basic panel; from there, you can lower the highlights to reel in the larger outlined light areas, raise the shadows to brighten your dark areas, and make any fine adjustments with the whites and blacks until your image looks balanced and natural in tone.
This function works especially well with product and real-estate photography that needs good lighting and proper tone. After fine-tuning, and complimenting a professional clipping path service for the images, the editors can have images that will be consistently polished as needed; which is critical for online catalogs, e-commerce catalogs, or any visual presentation where it matters most.
When to Use Professional Help
The elimination of glare – particularly when handling hundreds of product or portrait images – can become quite a time-consuming chore. Luckily, that is precisely the role of professional editing companies and clipping path services.
A clipping path effectively isolates a part of the image, for example by removing an item from the background, so that the editor can eliminate glare, match colors and brighten-up an image without changing the original details outside the isolated area.
Using professionals will not only expedite the editing process but will ensure quality creative work and return the photographer to the creative workflow rather than paying attention to what is simply mind numbingly repetitive work.
Professional editors not only remove glare, they will also make precise adjustments to remove effects, highlighting every line and feature in your image sharp, natural, and ready for your or your publication.
How to Avoid Glare in the First Place
While Photoshop can fix glare beautifully, preventing it is always better. Here are some simple photography habits that help:
Adjust the Light Source
Changing the angle of your lighting setup is one of the simplest ways to reduce glare. When light hits your subject directly, it often bounces back into the camera, creating bright reflections. Try repositioning your lights or using diffusers to soften the illumination. This technique spreads light more evenly, preventing harsh reflections on skin, glass, or metal surfaces. For professional photographers, combining this lighting control with expert clipping path services can ensure perfect results, especially in product shoots where precision matters.
Use a Polarizing Filter
A circular polarizing filter is a great option to reduce reflections. A circular polarizer will control how light interacts with the lens, providing a reduction in the glare from glass, water, or shiny surfaces, even before it gets to the camera. Making this minor adjustment can help improve images, especially in outdoor photography and for products. When combined with clipping path services, a circular polarizer will help create crisp images of products, free of glare, that are appropriate for a catalog image or e-commerce listing.
Avoid Direct Flash
Directly using flash can produce hot spots or shiny patches on your subjects. Instead, try to bounce the flash off a nearby wall, ceiling, or reflector so that it creates soft, diffused light. This not only adds depth, it scales back the glare, and finally creates a more natural, professional look to your images. Editors can always run the photo through clipping path services afterward to ensure consistency with the lighting in other photos.
Check Through the Viewfinder
Before snapping the photo, take a moment to check out how reflections look in your viewfinder or screen. By just shifting your location or the angle of the camera slightly, it is often possible to completely eliminate glare. Observing how light behaves before pressing the shutter gives you clearer, more balanced photos from the beginning, avoiding the possibility of excessive editing enhancements after the fact. It also will limit or eliminate the need to use clipping path service to eliminate glare from photographs.
These small steps will save you hours of editing later.

Why Clipping Path Services Matter for Professional Editing
When you’re using commercial images – especially for e-commerce, fashion, or real estate – their quality represents your brand. Consumers you may notice clear, crisp visuals, and glare-free photographs can often catch their attention instantly.
Clipping path services are especially useful as they isolate subjects wholly. Once the background has been removed or replaced, glare removal, for example, is much easier and more accurate. It also allows editors to more easily adjust brightness, color tone, and contrast.
For example:
- In product photography, glare can hide brand labels or distort textures.
- In portrait touch-ups, glare on glasses or skin can make faces look unreal.
- In real estate photographs, window or floor reflections can pull attention away from the space itself.
- Once a professional retouch is performed, with the use of clipping paths, editors can provide flawless images to meet commercial standards worldwide.
Conclusion
Glare, albeit annoying, is not permanent! With the proper techniques, editing in Photoshop affords all the correct tools to remove the glare quickly and with ease. Whether the glare is a few small spots that could use the Patch Tool, a good percentage of the picture requires texture correction with the Clone Stamp, or the skin is too shiny from the sun using the Brush Tool – each one will assist you in near perfection.
If bulk editing, or e-commerce images are in view, it is a good idea to have a team you can trust to improve the quality further with clipping path services and ensure the foreseeable image quality is as sharp, balanced, and impressionable as possible.
The key is patience – take your time, work one area at a time, and be subtle with your adjustments. Before you know it, glare is not something that matters; it is just another tweak in the editing toolbox, not a headache modifier.