
E-commerce photography plays a vital role in driving consumer purchasing decisions, as sight is the only sense available to online shoppers when assessing how an apparel item will fit and whether or not it is a quality item. The most important aspect of e-commerce photography involves symmetry among all items photographed professionally; symmetry often gets overlooked in professional apparel photography.
Symmetry in apparel photographs allows garments to be represented as being organized, constructed correctly, and trustworthy. Therefore, when clothing has a balanced appearance, customers can more readily comprehend the proportions and structure of the garments.
This article discusses how to create carefully symmetrical e-commerce garment photography through preparation, styling choices, camera settings, lighting considerations, and post-production techniques (i.e., clipping path services).
Why Symmetry Matters in Apparel Photography
The way apparel images are viewed is directly impacted by the way they are symmetrical. When the left and right sides of the garment are lined up evenly, the product appears neater and more professionally presented than garments with misaligned sleeves or collars or uneven hems, which has a negative effect even on garments of high quality.
Symmetrical images also help eliminate confusion. When images are arranged symmetrically, it will be more comprehensible for shoppers to comprehend the garment’s particular size, style, and characteristics. As a result of the confidence that this type of clarity builds, it can help reduce return rates for products that are not as expected.
In the highly competitive online retail channel, symmetry is a way for businesses to create visible continuity throughout their catalogs. A set of images with uniform symmetry creates an environment in which shoppers view the contents of the site as more credible and easier to navigate, enhancing their overall shopping experiences.
Understanding Symmetrical Apparel Photography
Shooting Symmetrical Apparel means Showing a garment’s left and right sides in a visually equal manner. Capturing Symmetrical Apparel can be accomplished in many ways, including: a Flat Lay or on a Mannequin, with a Ghost Mannequin Effect, suspended from a Hanger, or being worn on a Model.
In truth, true Symmetry cannot be produced merely by Editing. It requires a combination of all elements needed for creating Symmetrical Apparel including Garment Preparation, Garment Styling, Camera Positioning, Lighting and Post Production Refinement.
Pre-Shoot Preparation: The Foundation of Symmetry
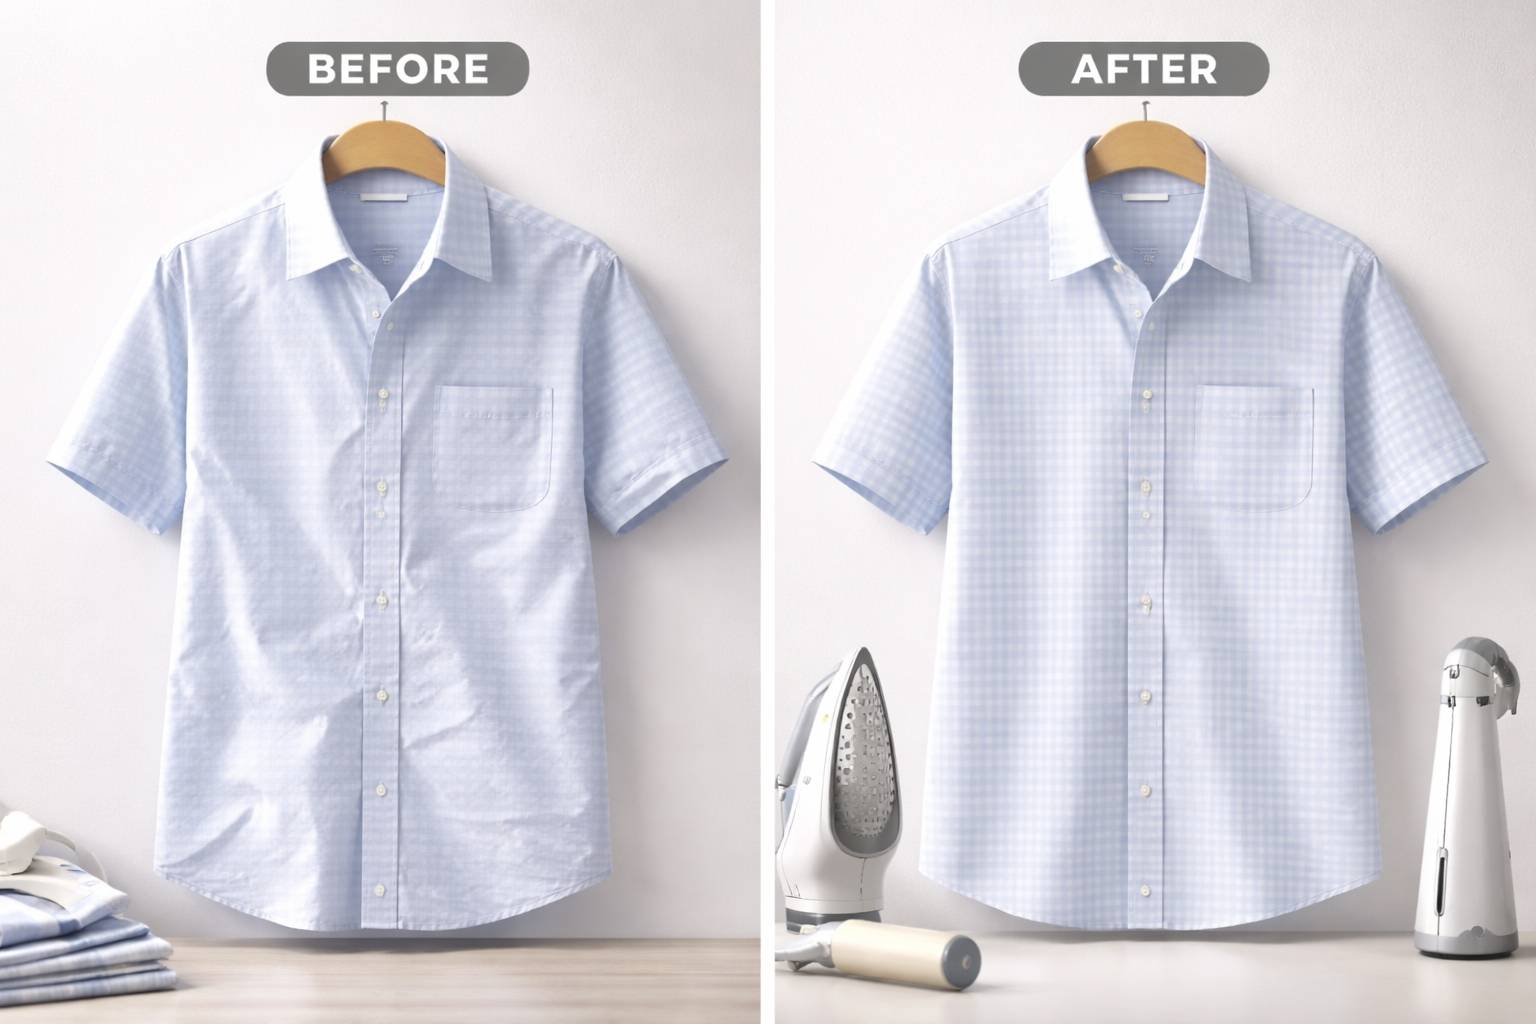
Preparation is necessary to create symmetry before you ever turn on your camera. Steam or iron all garments prior to taking any pictures, as wrinkles can make it difficult for the clothing to lay correctly. You will need to steam or iron each garment and also steam and iron each area of a button or zipper so that your photographic image portrays an accurate depiction of how the clothing looks.
Check that all buttons, zippers, and fasteners are aligned and in a straight line from the center of the garment to the outer edge of the fabric. Pay close attention to small details when photographing clothing. The collar of a shirt should lay flat on each side and the cuffs on each side should match heights. Seams should not pull or bend away from their intended path and should lay flat so they follow the natural curvature of the body.
To achieve the clean, symmetrical look of clothing, always ensure your garments are free from lint, dust, and any loose thread.
Even though it takes a little bit of time to prepare your garments for shooting, this will save you a lot of time when you start shooting the pictures and doing any edits after the fact.
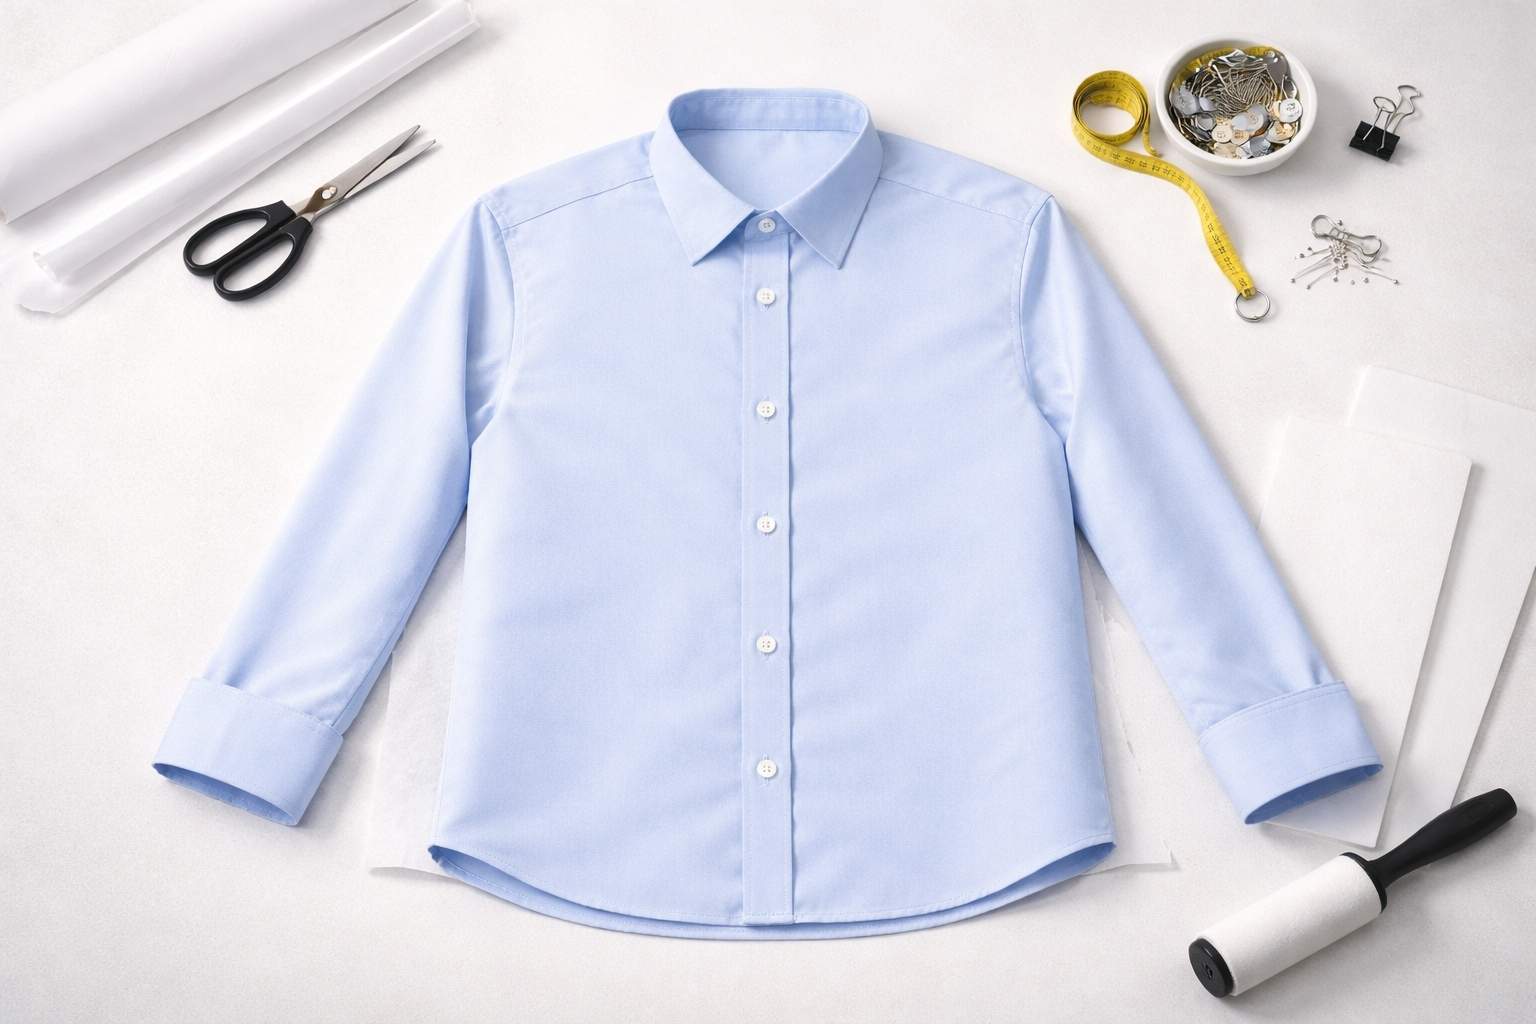
Choosing the Right Background and Shooting Surface
In order to emphasize the symmetry of the apparel, the surface on which it is displayed must be stable, free of clutter and flat. This is usually accomplished with a neutral background, typically white or light grey, so that the garment stands out from the background clearly.
One way that many professionals ensure that each garment is correctly aligned with the centre of the background is by using a very subtle guideline that will help them place their garments in a consistent position. This is particularly useful when photographing large collections since each product will be positioned in a uniform and balanced way.
Styling Techniques for Symmetrical Apparel Photos
Styling is one of the most important stages in achieving symmetry. How a garment is positioned and supported directly affects its visual balance.
Flat Lay Styling
In flat lay photography, garments are placed on a flat surface and photographed from above. Sleeves should be folded or extended evenly, and shoulders should align along a central axis. Even slight differences in angles can make apparel appear asymmetrical.
To maintain structure, soft materials such as tissue paper or foam boards are often placed inside garments. This prevents one side from collapsing more than the other and helps maintain an even shape throughout the garment.
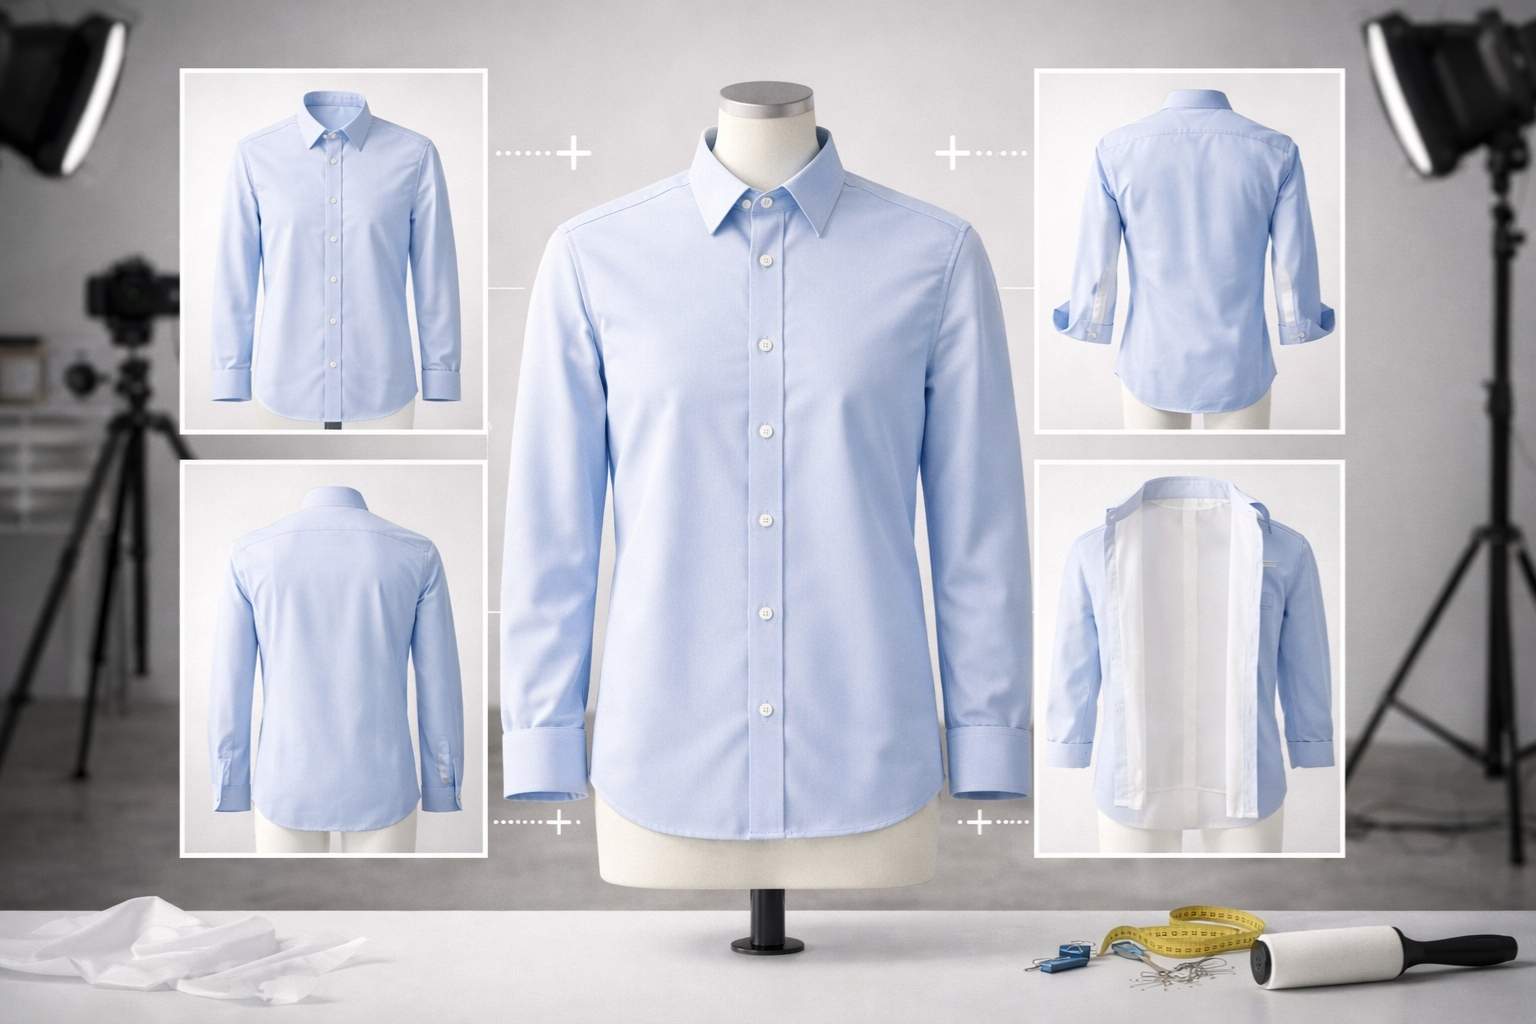
Mannequin and Ghost Mannequin Styling
While mannequin photography helps provide an additional level of dimension, aligning the mannequin properly is very important. The mannequin must stand up straight, and both sides of the garment must be evenly worn, otherwise the tension could cause one side to pull higher than the other.
Multiple photographs will be taken, and for ghost mannequin photography the images are merged together. It is essential to keep alignment of the mannequin consistent from the front to the back of the garment and on the inside so that they appear to be properly draped, while allowing the end product to look like one continuous garment that has symmetry.
Camera Setup and Positioning
A well-thought-out shooting angle is the key to ensuring that your clothing looks as nice as possible. Don’t shoot at an angle where it will look asymmetric. It’s also critical to use a tripod to maintain consistent and stable positioning of the camera. When taking images using either a mannequin or a hanger, always make sure that the camera is placed directly in front of the garment you are photographing.
Flat lay photos should have the camera placed much higher than the garment. Always ensure that the camera’s sensor remains aligned horizontally and vertically with the garment so that it does not create any distortions or alter how the garment looks size-wise. Consistently aligning the camera at the same height and angle for each shot will result in photographs of the clothing with symmetrical features.
Lens Choice and Camera Settings
Selecting an appropriate lens is vital in achieving symmetric results in photos. A wide-angle lens can distort and curve the edges of a picture, distorting the proportions of the subject. A standard or short telephoto lens helps produce natural lines/shapes and balance when photographing a subject.
By using an aperture of moderate size, you can keep the focus on the entire garment and create clarity on symmetrical features. Keeping your ISO set low helps produce high-quality images without any noise that would detract from the intricate details of any design.
Lighting for Balanced Apparel Images
Light affects symmetry significantly; uneven lighting will cast a shadow on one side of a garment making it look more substantial in weight or dark in colouration than the other side.
Balanced light sources are put on each side of a garment evenly. Matching lighting distance, height & intensity assures an even amount of light.
Diffused lighting creates a softer shadow and evenly highlights the garment’s details and patterns.With the correct lighting, you will see that both sides of the garment exhibit an even colour and texture.
Post-Production and Symmetry Refinement
To achieve the optimal level of symmetry through an image, regardless of how well it was prepared for shooting, post-production editing is important to create a perfect symmetrical illusion of the image. In post-production editing, the alignment of the apparel is refined, rather than the natural characteristics of the garment are altered.
Clipping path services provide an advantage during this process because they allow garments to be isolated from their backgrounds with a high degree of accuracy, enabling the garments to be positioned in the center of the image and placed on a clean, uniform background. This uniformly applies to multiple product images and ensures that all images have uniform spacing and that the garment appears straight when viewed.
After a background has been removed from an image, other minor modifications, such as minor cropping, straightening, and fine-tuning any small alignment issues will produce a perfect symmetric design and allow for a crisp, clean overall image of your product.
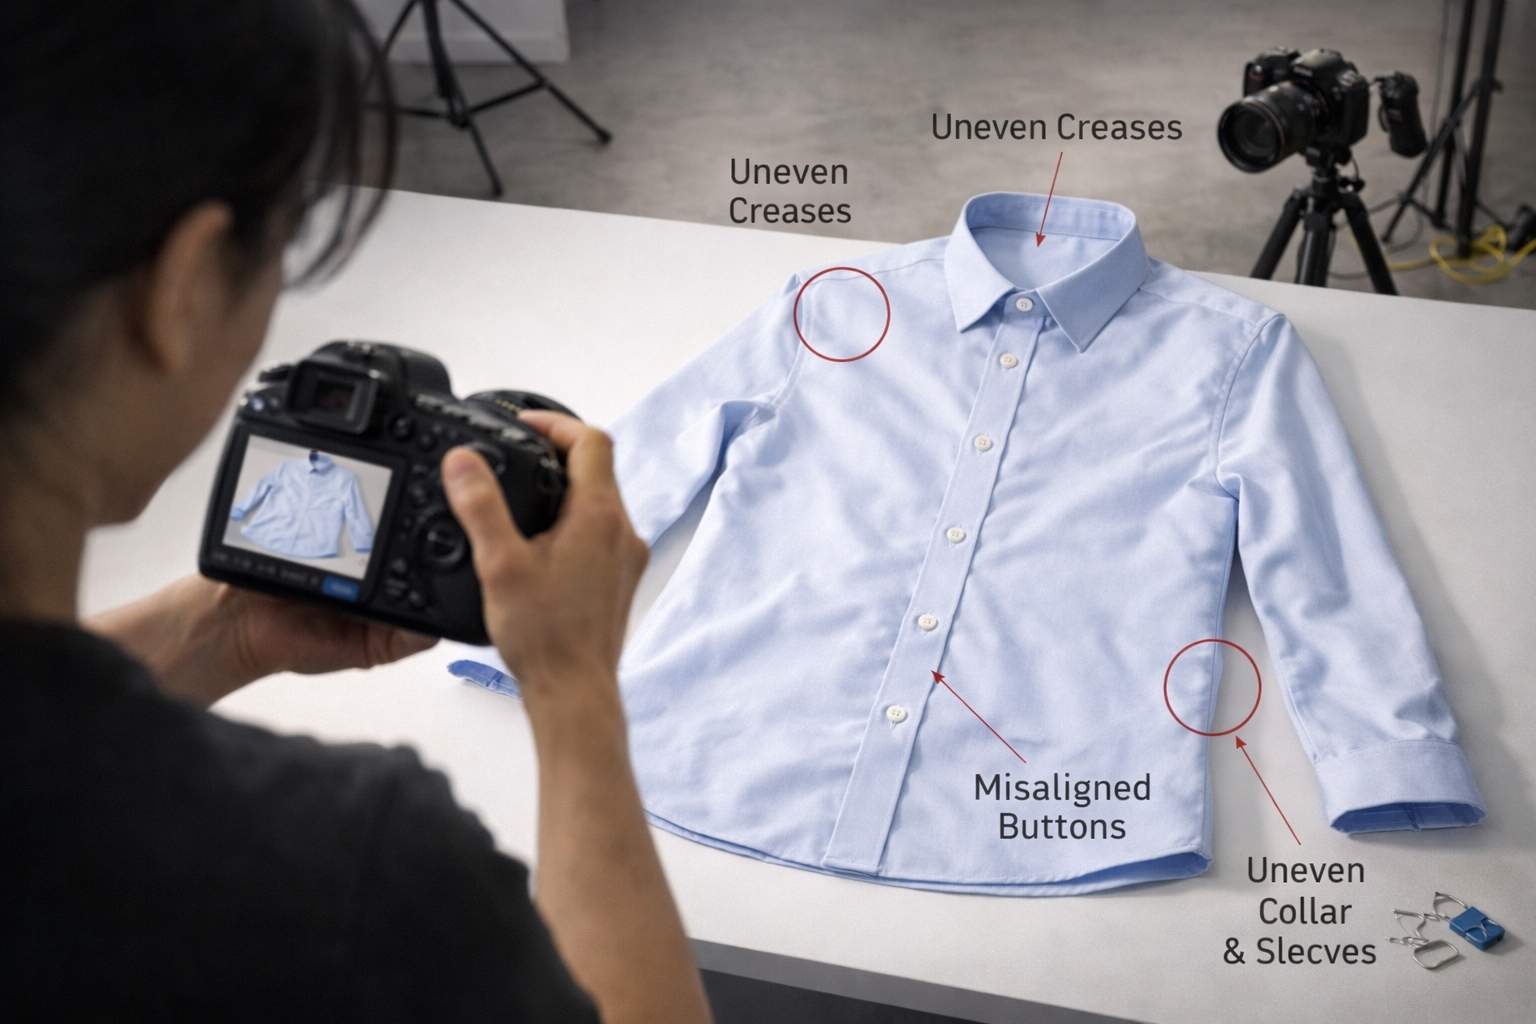
Common Symmetry Mistakes to Avoid
There are various symmetry problems that can arise from careless observations. Taking a photograph while standing without using a tripod may create different angles when the camera is raised above or below the lowest point. Not preparing clothing and garments may also create uneven creases or unaligned product details on the photograph. Inconsistent lighting and warped lenses may also create a perception of imbalance in a photograph.
By understanding, identifying, and correcting these mistakes, we can save time during the editing process and also produce higher quality images.
Additional Tips to Improve Symmetry in Apparel Photography
Even after following standard techniques, a few extra considerations can further enhance symmetry and consistency.
- Using reference images helps maintain uniform alignment across an entire catalog. By matching each new product to a reference, photographers ensure consistent placement and framing.
- Maintaining equal spacing around garments improves visual balance. Uneven space on one side can make apparel appear off-center, even if the garment itself is aligned.
- Paying attention to small design elements such as buttons, logos, or pockets prevents visual imbalance. These details should sit straight and evenly to avoid distracting the viewer.
- Avoiding overstretching fabric ensures garments retain their natural shape. Pulling too tightly on one side can distort symmetry and affect how the product is perceived.
- Reviewing images on multiple devices helps identify alignment issues that may not be visible on a single screen. This ensures consistency across desktop and mobile views.
- Maintaining consistent post-production workflows, supported by clipping path services, helps create a cohesive and symmetrical product presentation across all listings.
Final Thoughts
It takes a lot of planning, precision and replicability to achieve perfectly balanced apparel photos for e-commerce. From arranging a garment and aligning the camera to ensuring proper lighting and airbrushing/ retouching, these are just a few of the steps that create a beautifully balanced image of the product on the e-commerce website.
A product shot that has symmetry has more transparency and is a testament to the amount of trust you place in the consumer. Adding Symmetrical Apparel Photography to Professional Service Techniques such as Clipping Path creates a strong brand visual strategy to develop high-quality images that help convert sales in the eCommerce world.