
We’ve all had this one experience: you take a picture that is beautiful at first glance; however, when you take a closer look, you see a lot going on in the background. It could have been too many animals roaming free in the shot, or all the clutter that got in the way of the photo.
You might notice that you have perfect lighting on your subject, but everything else in that photo is totally washed out. You look at your favorite editing software, grab your erase tool, and start to erase the background.
You take 10 minutes and are very happy with what you have created at this point; however, at the same time, something changed, and you accidentally deleted your subject’s hair. At this point, your only option is to close your editing software and either re-create the photo from scratch or keep your fingers crossed that you have enough UNDOs left to get back to a point where your subject has hair.
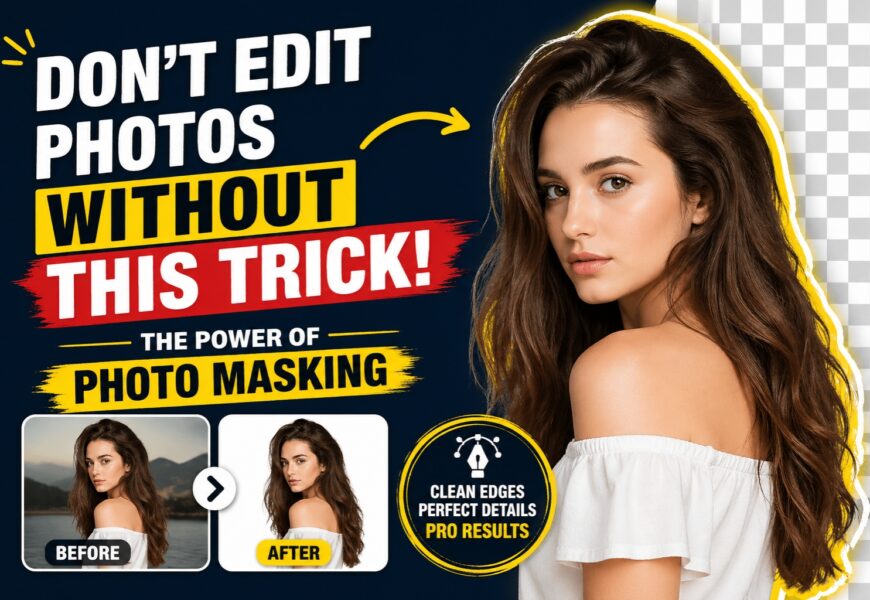
If this sounds like you, then you are missing out on one of the most basic yet incredibly helpful tricks when it comes to commercial photography (or even just for fun): Photo Masking! Knowing how to use a photo masking service to achieve the perfect shot is one of the most important things for any aspiring or professional commercial photographer.
What Exactly is Photo Masking?
In the simplest terms, photo masking is a non-destructive way to hide or reveal parts of an image. Think of it like placing a stencil over a drawing. You aren’t erasing the drawing; you’re just choosing which parts are visible through the holes in the stencil.
In digital editing, we usually use “Layer Masks.”
- White on a mask means the image is visible.
- Black on a mask means the image is hidden (transparent).
- Gray creates various levels of transparency.
Why is this better than erasing?
When you erase pixels, they are gone. When you mask pixels, they are simply “tucked away.” If you realize tomorrow that you hid too much of a person’s shoulder, you just paint white back onto the mask, and—voila!—the shoulder reappears.
Why You Need a Photo Masking Service
While basic shapes are easy to handle, things get complicated when you deal with “soft edges.” Imagine trying to cut out a model with frizzy hair, a furry golden retriever, or a person wearing a translucent chiffon scarf.
This is where a professional photo masking service becomes a lifesaver. Standard clipping paths (using the Pen Tool) work for hard edges like a smartphone or a cereal box. But for hair, fur, and transparency, you need advanced masking.
The Benefits of Professional Masking:
- Precision: Capturing individual strands of hair that would otherwise be lost.
- Consistency: Ensuring every product photo on your website looks uniform.
- Time-Saving: Masking a complex image can take an amateur hours; a pro service does it in minutes.
- Natural Results: No “jagged edges” or “halo effects” around your subjects.
How to Mask Photos in Photoshop: A Step-by-Step Guide

If you want to try your hand at the craft, learning how to mask photos in Photoshop is the gold standard. Here is the most common workflow for beginners:
Step 1: The Selection
Use the Select Subject button or the Quick Selection Tool (W) to get a rough outline of your object. Don’t worry if it isn’t perfect yet.
Step 2: Create the Mask
At the bottom of your Layers panel, look for the icon that looks like a rectangle with a circle inside it. Click it. You’ll see a white thumbnail appear next to your image layer. This is your mask.
Step 3: Refine the Edges
This is the “pro trick.” Go to Select and Mask at the top of the screen. Use the Refine Edge Brush Tool to paint over tricky areas like hair or fur. Photoshop’s AI will look at the colors and try to separate the fine details from the background.
Step 4: Fine-Tuning with the Brush
If the AI missed a spot:
- Select the Brush Tool (B).
- Ensure your foreground color is Black to hide or White to reveal.
- Paint directly onto the mask thumbnail to clean up the edges.
The Fun Side: Custom Face Mask from Photo
Photo masking isn’t just for professional catalogs; it’s also the engine behind the personalized gift industry. Have you ever seen a custom face mask from photo? Whether it’s a surgical-style mask with your own smile printed on it or a cardboard cutout for a party, masking is how it’s made.
To create a custom face mask, an editor must:
- Isolate the face: Using photo masking to remove the neck, hair, and background.
- Feather the edges: Ensuring the face doesn’t look like a harsh sticker.
- Color match: Adjusting the skin tones so they look vibrant when printed on fabric.
Without high-quality masking, these custom products look “cheap” or “choppy.” Good masking makes the transition between the photo and the physical product seamless.
Common Types of Photo Masking
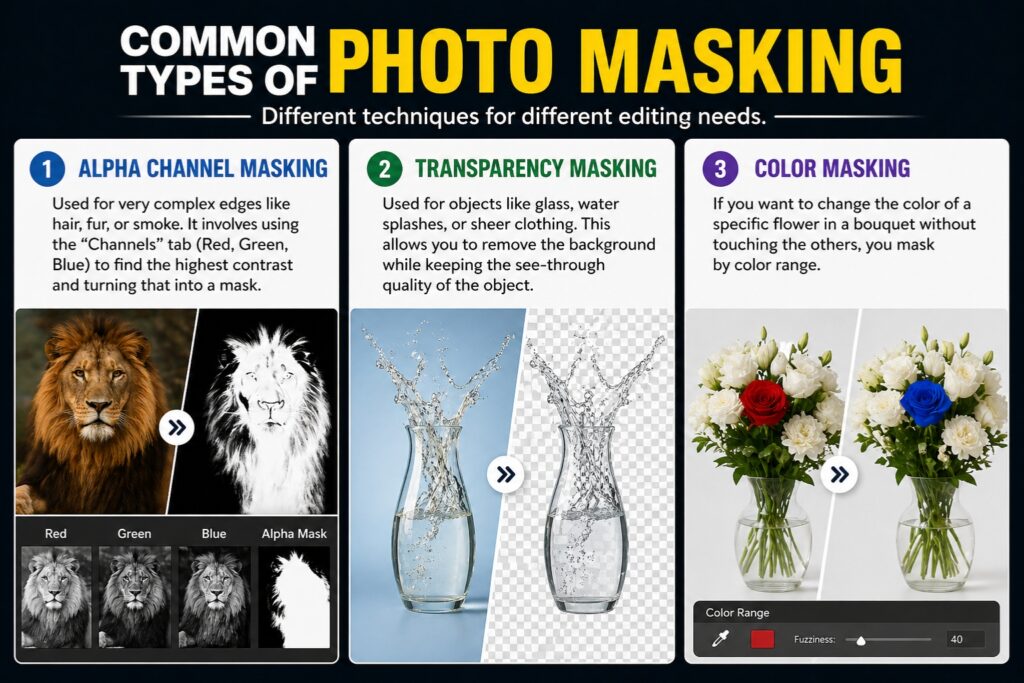
Not all images are created equal. Depending on what you are editing, you might need a specific type of photo masking:
1. Alpha Channel Masking
This is used for very complex edges like hair, fur, or smoke. It involves using the “Channels” tab (Red, Green, Blue) to find the highest contrast and turning that into a mask.
2. Transparency Masking
Used for objects like glass, water splashes, or sheer clothing. This allows you to remove the background while keeping the see-through quality of the object.
3. Color Masking
If you want to change the color of a specific flower in a bouquet without touching the others, you mask by color range.
Can You Mask Photos Online?
Not everyone wants to pay a monthly subscription for Adobe Creative Cloud. If you’re looking for a photo mask online, there are several web-based tools that have become surprisingly powerful.
- Canva: Offers a “Background Remover” for Pro users that essentially performs an automated mask.
- Pixlr: A free browser-based editor that supports layer masks.
- Remove.bg: Great for quick, AI-driven masking, though it struggles with very fine hair.
While these online tools are great for social media posts, they often lack the “human touch” required for high-end commercial work. For a professional finish, a dedicated photo masking service using manual techniques is still the best route.
5 Pro Tips for Better Photo Masking
If you are committed to mastering masking a photo on your own, keep these tips in mind to avoid looking like an amateur:
1. Use a Soft Brush
Avoid using a brush with 100% hardness. A slightly soft edge (around 10-20%) mimics the natural lens blur (bokeh) found in real photography.
2. Zoom In (Way In)
Don’t mask from a distance. Zoom in to 300% or 400% to ensure you aren’t leaving “halos”—those tiny lines of the old background that cling to the edges of your subject.
3. Check Against Different Backgrounds
A mask might look perfect against a white background but terrible against a black one. Create a temporary “solid color” layer and move it behind your mask to check for stray pixels.
4. Don’t Over-Mask
In the quest for a clean cut, many people accidentally “shave” off parts of the subject. If you’re masking a person, don’t cut into their skin to hide the background; it makes them look like a plastic mannequin.
5. Use a Pen Tablet
If you do a lot of masking, throw away the mouse. A stylus (like a Wacom or Huion tablet) allows for pressure sensitivity. You can press lightly to hide a little and harder to hide a lot, making the process feel like painting.
The Business Impact: Why Quality Masking Matters
If you run an e-commerce store, your photos are your storefront. Poorly masked images—where you can still see the shadow of the photographer’s studio or where the edges of a product look “fuzzy”—subconsciously tell the customer that your brand is unprofessional.
By using a photo masking service, you ensure:
- Improved Conversion Rates: Clean, crisp images lead to more sales.
- Brand Trust: High-quality visuals imply a high-quality product.
- Platform Compliance: Sites like Amazon and Google Shopping have strict requirements for pure white backgrounds. Masking is the only way to achieve this without making the product look “floating” or fake.
Conclusion: The Secret is in the Mask
Editing is an art, but masking is the science that supports it. Whether you are creating a custom face mask from photo for a friend’s birthday or preparing a 100-item catalog for an international brand, photo masking is the “trick” that separates the amateurs from the pros.
Stop erasing your hard work. Start masking. By preserving your pixels and focusing on the fine details, you’ll find that your photo editing becomes faster, more creative, and infinitely more professional.
If the technical side feels overwhelming, don’t hesitate to reach out to a professional photo masking service. Sometimes, the best editing trick of all is knowing when to let the experts handle the pixels while you focus on the big picture.