Clipping Path is the technique that you would come across if you have dealt with product photos, eCommerce photos, advertisement designs, and professional photo editing. Clipping Path technique is very effective when working in Adobe Photoshop if you want to cut out an object or a product without losing its sharp and professional edges.
Creating a clipping path in Photoshop might be slightly difficult at first since you might not have worked much on the Pen Tool yet. But if you understand the way paths function, you will see that creating paths is quite simple after some practice. Furthermore, using the Pen Tool for selecting objects is the most reliable way if the object or product has sharp edges.
The correctly made clipping path allows one to have control over a lot of tasks, such as background removal, change the background colors, make images transparent, prepare photos of goods for online shops or even create several versions of the same image.
In the course of this tutorial, we will learn how to make a Clipping Path in Photoshop, when it is appropriate to apply it, what mistakes need to be avoided in this process and how the described method may be used to make Multi Clipping Path.
What Is a Clipping Path?
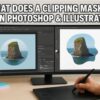
A clipping path is a vector outline that surrounds the subject in an image. The path is usually created using the Pen Tool in Photoshop. This allows you to extract a particular object from the rest of the picture.
It would help to think of it as an outline drawn around the object you wish to use. This way, Photoshop knows that the space within the outline is what you need while the space outside can be deleted or altered as you see fit.
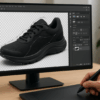
As an illustration, consider an image with a shoe placed on a gray background. If you were to put this shoe on a pure white background for an eCommerce site, you can use a path around the shoe to remove it from its background.
However, accuracy is key. It’s easy for the path to become too loose and leave extra background or be too tight and cut through the object itself.
Why Use a Clipping Path in Photoshop?
There are various ways in which you can remove the background in Photoshop. Some of these include automatic selection tools, background removal tools, and masking. But why choose to use clipping paths?
Well, it’s because of control.
Since you create the clipping path yourself through the use of the pen tool, you get to decide precisely where the outline of your object needs to go.
Clipping paths are commonly used for:
- eCommerce product photography
- Fashion and apparel images
- Jewelry and accessories
- Furniture photography
- Catalog design
- Advertising materials
- Product packaging
- Website graphics
- Print publications
- Online marketplaces
For professional commercial work, clean edges can make a huge difference. Even a small amount of unwanted background around a product can make an image look unfinished.
What You Need Before Creating a Clipping Path
First, you want to start with opening the image in Adobe Photoshop.
A high-quality image is always preferred as the edges of that image appear properly. Any image placed well with good contrast will become easier to work with.
When you open the image, it’s a great idea to copy the base layer.
Open the Layers panel and choose your image layer to make a copy. Ctrl + J for Windows or Command + J for Mac.
By working on copied image, you can secure your original image layer while being able to make all the changes to it.
Step 1: Select the Pen Tool
The Pen Tool is the most commonly used tool for creating a precise clipping path.
You can find it in the Photoshop toolbar or select it using the keyboard shortcut P.
When the Pen Tool is active, make sure you are creating a path rather than a shape. Depending on your Photoshop version and settings, check the options bar at the top and select Path.
This is important because you want to create a vector path around your subject rather than paint or create a filled shape.
Step 2: Start Placing Anchor Points
Now comes the part that requires the most attention.
Zoom into your image and start placing anchor points along the edge of your subject.
You don’t need to place a point at every single pixel or tiny change in the edge. Instead, place points at important changes in direction.
For example, if you are creating a path around a rectangular product, you might place anchor points at the corners and then use straight lines between them.
For curved products, you will need to use the Pen Tool’s handles to create smooth curves.
The goal is to create a path that follows the natural edge of the object as closely as possible.
A useful tip
Avoid placing too many anchor points.
Beginners often think that more points mean more accuracy. In reality, too many points can make your path uneven and difficult to edit.
Fewer, carefully positioned anchor points usually create smoother and more professional curves.
Step 3: Create Smooth Curves
Many products contain rounded edges, such as bottles, watches, shoes, furniture, or cosmetic packaging.
To create a smooth curve, click and drag when placing an anchor point. This creates direction handles that control the curve of the path.
Move the handles until the path follows the edge of the object.
Don’t worry if the curve isn’t perfect on your first attempt. You can always return to the anchor point and adjust the handles.
The more you practice, the easier it becomes to predict how the curve will behave.
Step 4: Follow the Entire Object
Continue working around the subject until you reach the starting point.
Try to keep the path slightly inside the actual edge when necessary, particularly when the background is strongly contrasting with the subject.
Take your time around corners and detailed areas.
If the product has a sharp corner, use an appropriate anchor point to create that corner instead of forcing a smooth curve.
The key is to follow the actual shape of the product rather than creating a generic outline.
Step 5: Close the Path
Once you have worked around the entire object, move the Pen Tool back to your first anchor point.
You should see a small circle next to the Pen Tool cursor. Click on the original point to close the path.
At this stage, you have successfully created your basic clipping path.
But you are not finished yet.
Step 6: Save the Path
Open the Paths panel in Photoshop.
If you don’t see it, go to:
Window → Paths
You should see your newly created path.
Photoshop may initially call it “Work Path.” This is temporary, so rename it to something meaningful, such as Clipping Path.
Right-click the path and choose the appropriate saving option, or double-click the path name and rename it.
Saving the path is important because a temporary Work Path can disappear if you start creating another path.
Step 7: Check the Path Carefully
Before using your clipping path, zoom in and inspect the entire outline.
Look for areas where:
- The path cuts into the product
- There is too much background around the edge
- Curves look uneven
- Corners are too rounded
- Anchor points are unnecessarily close together
- Small sections of the product have been missed
This quality-check stage is often what separates a basic clipping path from a professional one.
If you find a problem, use the Direct Selection Tool to adjust individual anchor points and handles.
Step 8: Convert the Path Into a Selection
Once you are happy with your path, you can turn it into a selection.
In the Paths panel, right-click your clipping path and choose Make Selection.
Photoshop will display a dialog box where you can set the Feather Radius.
For most sharp product cutouts, a very small feather value is appropriate. The exact setting depends on the image and the desired result.
After confirming, Photoshop will create a selection around the product.
You can now use this selection with a layer mask, copy the subject to another layer, or place it against a different background.
Step 9: Use a Layer Mask Instead of Permanently Deleting the Background
If you want a safer and more professional workflow, consider using a layer mask.
With your product selected, click the Add Layer Mask button in the Layers panel.
Photoshop will hide the unwanted background while keeping the original pixels available underneath.
This is called a non-destructive editing workflow.
The advantage is simple: if you later discover that part of the product was accidentally hidden, you can paint on the mask to restore it.
This is much safer than permanently deleting pixels.
What Is a Multi Clipping Path?

Sometimes one clipping path isn’t enough. This is where Multi Clipping Path becomes useful.
A Multi Clipping Path workflow involves creating multiple paths within the same image so different parts of the product can be edited independently.
For example, imagine you have a handbag with several different elements:
- Main body
- Handles
- Buckles
- Straps
- Metal accessories
You may want to change the color of the handbag without changing the metal buckles. A single path around the entire product won’t give you enough control.
Instead, you can create separate paths for different areas.
One path could cover the main body, another could cover the handles, and another could isolate the metal components.
You can then adjust each area independently.
When Should You Use a Multi Clipping Path?
Multi Clipping Path is particularly helpful when an image contains multiple color or material areas.
It can be useful for:
- Changing product colors
- Adjusting individual parts
- Creating multiple product variations
- Changing fabric colors
- Editing accessories
- Adjusting specific materials
- Preparing catalog images
- Creating eCommerce product variations
For example, suppose a shoe is available in black, blue, red, and white. Instead of photographing every color separately, a properly prepared image can sometimes be used as a base for creating multiple color variations.
Separate paths give the editor more control over which sections should be modified.
Common Mistakes When Creating a Clipping Path
Creating a good clipping path takes practice. Here are some mistakes beginners frequently make.
Using Too Many Anchor Points
Too many points make curves difficult to control and can result in rough edges.
Use fewer points whenever possible.
Creating Loose Paths
If your path is far away from the actual edge of the object, unwanted background may remain around the product.
Stay close to the edge while maintaining a natural outline.
Cutting Into the Product
The opposite problem is being too aggressive.
If the path crosses inside the product, important parts of the subject can disappear when the background is removed.
Ignoring Corners
Sharp corners require careful handling. Don’t treat every edge as a smooth curve.
Working Without Zooming In
At normal zoom levels, small inaccuracies may be difficult to notice.
Zoom in when creating and checking detailed areas, especially around corners and curves.
Forgetting to Save the Path
A Work Path can be temporary.
Always save and rename your finished path so you can access it later.
Clipping Path vs. Automatic Background Removal
Photoshop has become increasingly powerful with automatic selection and AI-assisted tools. These options can be extremely useful when you need a quick result.
However, automatic tools aren’t always perfect.
They can struggle with complicated edges, reflections, similar colors, small gaps, or unusual product shapes.
A manually created clipping path takes more time, but it provides much greater control over the final edge.
For simple products with hard edges, a clipping path can produce a particularly clean result.
For subjects with hair, fur, smoke, transparent materials, or soft edges, other techniques such as layer masking, channels, or specialized masking methods may be more appropriate.
Tips for Creating Professional Clipping Paths
If you want your paths to look professional, focus on consistency.
Always inspect the image before you start. Understand where the hard edges, curves, corners, and complicated areas are located.
Use the Pen Tool carefully and avoid rushing.
Keep your anchor points organized and don’t create unnecessary points.
Zoom in for detailed areas, but remember to zoom back out occasionally to make sure the overall shape still looks natural.
Most importantly, practice.
Final Thoughts
Mastering the art of creating a Clipping Path within Photoshop is a skill that can become more useful the more you employ it. Photoshop possesses plenty of automatic tools that help with selection, but by using the manual creation method, you can get absolute control over the shape and edges of your subject.
The actual process is quite simple: the first step is to load the picture you want, then select the Pen tool and properly track the object, then close your path and save it, evaluate the edges, and apply the path to make an exact selection or mask.
When you have learned how to do paths properly, you can start working with advanced techniques, including Multi Clipping Path. This technique allows for separate editing of product areas, which is helpful in cases of color changes, creating merchandises, catalogs, and taking images for online selling.
Thus, although creating a proper clipping path may seem irrelevant, it is actually an essential step of photo editing because when the edges are properly done and the subject is well isolated from the background, an image becomes more aesthetically pleasing.