Whether it comes to removing unneeded elements, cleaning up edges, or editing a portrait perfectly, the eraser tool on Photoshop still remains one of the most efficient ways to edit pictures. Even though many amateurs use automatic AI picture editing options, professionals still apply traditional erasing methods for achieving ideal results.
Along with advanced photo editing on Photoshop, eraser tool allows editors to make pictures look natural without any signs of edits. It is important not only to know healing brushes and masks but also to understand when and how to use an eraser tool.
In this ultimate guide to using erasers in Photoshop, you will learn about various eraser tools, their working principles, work flow of professional photographers, mistakes to avoid, and helpful tips from experienced professionals.
What is the Eraser Tool in Photoshop?
Photoshop eraser tool is a brush tool used for eliminating pixels in your image or making them transparent depending on what type of layer you are working with.
In contrast to many automated removing tools, using the eraser provides full manual control of those pixels which will be deleted. Such precise control is really important for any photo editing process in Photoshop where the smallest defect might spoil the result.
Professional editors use eraser tool after selections, masking or object removal processes. They do not remove whole parts of their image, but only undesired details.
Despite being a rather easy tool, knowledge of how to properly set up the eraser tool will give you the opportunity to make very precise corrections which might be hard to make for artificial intelligence algorithms.
Why Professionals Still Use Eraser on Photoshop
The current version of Photoshop features AI-based tools such as Generative Fill and Remove Tool; however, professionals keep using eraser on Photoshop because of the level of precision that it allows. Manual editing plays a significant role while doing commercial photography, product photos, portraits, and fashion photography.
Professionals appreciate the eraser because it:
- Offers full control over every brushstroke rather than using automatic algorithms. It allows users to retain all the necessary information in an image while deleting only unnecessary pixels which distract from the final image composition.
- Functions perfectly well with layer masks, selections, and adjustment layers. The users are able to create non-destructive workspaces that can be further modified without any permanent damage to the original image.
- Gives clean edge lines when it comes to editing out complex shapes like hair, jewelry, clothes, and product outlines.
Types of Eraser Tool Photoshop
Photoshop includes several different eraser options, each designed for specific editing situations.
Standard Eraser Tool
The standard eraser removes pixels using a customizable brush.
Editors can adjust:
- Brush hardness
- Brush size
- Opacity
- Flow
- Shape dynamics
This flexibility makes it suitable for almost every stage of Photo Retouching in Photoshop, from cleaning portrait edges to refining product cutouts.
Background Eraser Tool
The Background Eraser intelligently removes pixels based on sampled colors.
It is particularly useful when:
- Removing simple backgrounds
- Separating hair from solid backgrounds
- Cleaning soft edges
- Creating transparent PNG images
Unlike the standard eraser, it attempts to preserve foreground objects while deleting similar surrounding colors.
Magic Eraser Tool
The Magic Eraser removes connected pixels with similar colors using a tolerance value.
It works best when:
- Background colors are uniform
- Logos have solid backgrounds
- Icons require transparency
- Product images have plain white backgrounds
Although quick, it requires careful adjustment to avoid deleting important image details.
Where the Eraser Fits into Photo Retouching in Photoshop
Many beginners believe the eraser should be their first editing tool.
Professional editors actually use it much later in the workflow.
A typical photo retouching in Photoshop process looks like this:
- RAW adjustments
- Exposure correction
- Color grading
- Skin retouching
- Frequency separation
- Object removal
- Dodge and burn
- Final cleanup using the eraser tool Photoshop
This sequence ensures that important image details are preserved before permanently removing unwanted pixels.
Understanding Eraser Brush Settings
Learning brush settings dramatically improves editing quality.
Brush Size
A larger brush speeds up editing large areas. A smaller brush provides better precision around facial features, jewelry, and product edges. Choosing the correct brush size helps avoid over-erasing important details.
Hardness
Brush hardness controls edge softness.
- Soft brushes create smooth transitions between edited and untouched areas, making them ideal for portrait retouching, skin blending, and subtle cleanup where harsh edges would appear unnatural.
- Hard brushes produce crisp, defined edges that work better for product photography, logos, packaging images, and graphic design projects requiring sharp boundaries.
Opacity
Opacity determines how much of the image is erased with each stroke. Lower opacity allows gradual corrections instead of deleting pixels immediately. Professional retouchers often work between 20% and 60% opacity when refining portraits.
Flow
Flow controls how quickly the brush removes pixels while painting. Lower flow produces smoother edits that build gradually. This is especially useful during photo retouching in Photoshop, where subtle adjustments create more realistic results.
Best Uses of Eraser on Photoshop
The eraser on Photoshop serves many purposes beyond simple deletion.
Cleaning Product Photography
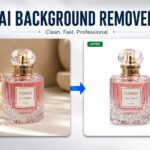
E-commerce images often require perfectly clean edges.
Editors use the eraser to remove leftover masking artifacts, unwanted shadows, and tiny imperfections around products, ensuring a polished appearance that meets marketplace standards.
Portrait Retouching
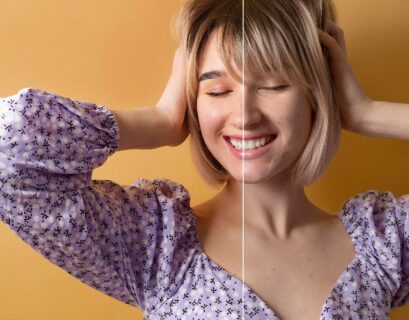
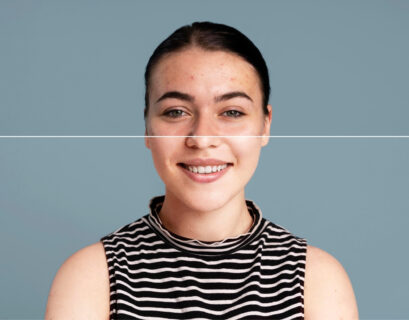
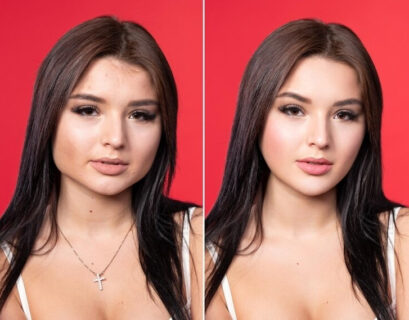
Portrait editors frequently erase unwanted distractions after advanced retouching. Small hairs, clothing lint, background distractions, and stray makeup particles can be carefully removed while preserving realistic skin texture and facial features.
Composite Images
When combining multiple photographs into one composition, edges rarely blend perfectly. The eraser allows editors to manually refine transitions between layers, creating seamless composites that appear completely natural.
Graphic Design Projects
Designers frequently utilize the eraser tool in Photoshop when modifying logos, icons, illustrations, and promotional graphics. Manual erasing helps create cleaner artwork without affecting surrounding design elements.
Common Mistakes Beginners Make
Learning from common mistakes can save hours of editing time.
Erasing Directly on the Original Layer
Many beginners permanently erase pixels from the original image. A better workflow involves duplicating the layer first or using masks whenever possible. This approach allows changes to be reversed later if adjustments are needed.
Using Large Brushes
Oversized brushes often remove details unintentionally. Working with smaller brushes provides better accuracy, especially around eyes, hair, clothing, and product edges where precision is essential.
Ignoring Brush Hardness
Using a hard brush everywhere creates unnatural editing lines. Choosing the correct hardness based on the subject produces smoother, more professional results during photo retouching in Photoshop.
Over-Erasing
Trying to remove every tiny imperfection can make images appear artificial. Professional retouchers know that maintaining natural texture creates more believable photographs.
Eraser Tool vs Layer Masks
One question beginners frequently ask is whether they should use the eraser or masks. The answer depends on the editing goal.
Eraser Tool
- Permanently removes pixels from a layer, making it useful for final cleanup once you are completely satisfied with your edits and no further revisions are expected.
- Works faster for small corrections where creating additional masks would unnecessarily complicate the editing workflow, especially during finishing touches.
Layer Masks
- Hide pixels instead of deleting them, allowing unlimited revisions throughout the editing process without damaging the original image. This makes masks the preferred choice for complex professional projects.
- Offer greater flexibility when collaborating with clients because hidden areas can easily be restored or adjusted based on feedback, saving time and preserving image quality.
Most professional editors combine masks and the eraser tool Photoshop to achieve the best results.
Tips for Better Photo Retouching in Photoshop Using the Eraser
Improving your workflow requires more than simply selecting the tool.
Consider these professional techniques:
- Zoom into the picture while editing it to be able to erase small details without affecting other textures, edges, and details.
- Decrease brush opacity while retouching portraits to achieve a smooth result instead of noticeable editing traces.
- It is better to use a graphics tablet while erasing to have smoother control over the brush, which is much more convenient than using a mouse.
- Compare layers to see the difference between the edited picture and the initial one regularly to make sure that you are improving the picture without losing natural traits.
- Keep all changes in layered PSD files in case you will need to make some changes later.
Keyboard Shortcuts That Speed Up Editing
Efficient editors rely heavily on shortcuts.
Some useful shortcuts include:
- Click on E to directly access the eraser tool, which will help save time in accessing Photoshop’s tool bar.
- Hit the [ and ] keys respectively to adjust the size of the brush rapidly without having to open brush settings.
- Holding down the Spacebar will give you access to the Hand Tool to navigate around an image zoomed in, thus speeding up your editing process.
- Ctrl + Z or Command + Z will undo any mistakes made during the editing process.
When Not to Use the Eraser Tool
Although powerful, the eraser is not always the best solution.
Avoid using it when:
- You expect multiple client revisions.
- You are performing advanced compositing.
- The image requires non-destructive editing.
- Complex selections are still changing.
- Layer masks offer greater flexibility.
In these situations, masks preserve more editing options while still allowing professional-quality photo retouching in Photoshop.
Combining the Eraser with Other Photoshop Tools
The combination of Photoshop’s eraser tool with other tools adds more efficiency to the software. For instance, one may start working with selection first, then work on sharpening the edges using the eraser tool. Healing tools can be used to eliminate blemishes, and the eraser will take care of whatever is left behind. Dodge and burn are useful in lighting adjustments, and the eraser tool will help eliminate any transition zones.
Such a combination results in professional-quality pictures.
Final Thoughts
In summary, while the eraser tool Photoshop is quite simple in Photoshop, it is still an important element that should be used by any professional editor. It will help them refine product photos, perfect portrait photos, composite photographs and many other types.
If you use the eraser on Photoshop right, then it will become an excellent companion to advanced photo retouching in Photoshop for the removal of distractions and at the same time keeping the natural details of image quality. With the knowledge of brush settings, the choice of correct eraser types and non-destructive editing practices, you can achieve great results.