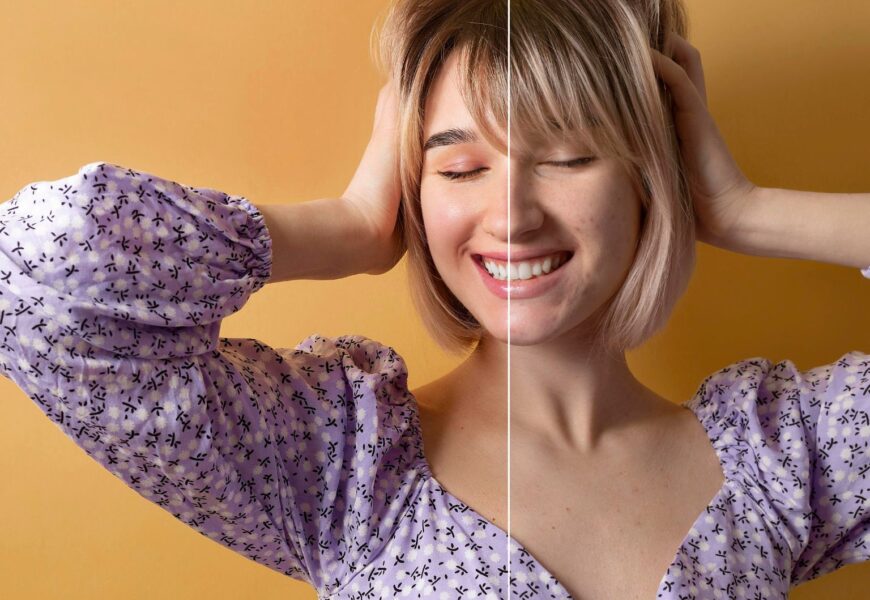
No more exclusive natural portraits in magazines or star promotions. Nowadays, every photographer, designer, influencer, and eCommerce business uses photo retouching in Photoshop in order to get a nice and natural portrait picture. Among numerous editing tools there is the skin smoothing – the most popular tool, as it provides good results and doesn’t change the identity of the model.
The beginner’s mistakes are using too much blur or some filters removing every pore from the picture making “plastic skin” and thus deteriorating the quality of the picture. However, professional editors know what they are doing and the point is not to remove the skin texture, but to refine it.
In this detailed guide, you will learn how professionals edit their photos in Photoshop, how to get the best skin smoothing, which skin smoothing tool is better to use under specific circumstances, face smoother tool comparison with Photoshop techniques, and skin smoothing in photos.
Why Skin Smoothing Matters in Professional Photo Editing
Any camera records much more details than a person sees in his/her daily life. High-quality sensors tend to show temporary imperfections like blemishes, uneven lighting, dry skin, redness, and other small imperfections.
Retouching photos in Photoshop implies dealing with temporary imperfections without taking away the character of the portrait. The technique involves not changing facial features but just focusing the viewer’s eye on eyes, expression, and composition of the photo.
This technique makes it possible to use portraits in fashion photography, beauty campaigns, corporate photographs, wedding photography, social media, advertising, and magazines.
What is Skin Smoothing?
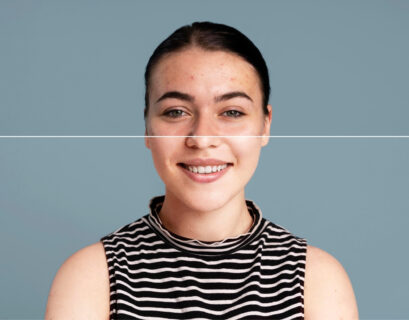
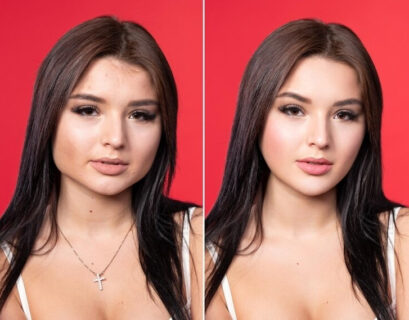
Skin smoothing is the practice of eliminating skin imperfections without losing realism in terms of texture. As opposed to erasing pores, wrinkles, or other features of a face, a person smooths out skin in order to get rid of harsh elements that come from lighting, a camera sensor, or some temporary skin state.
The modern approach to skin smoothing involves both manual and AI-based editing. Typically, professionals change the color, remove imperfections, smooth out rough texture, and keep facial features intact.
The main difference between amateur and professional skin retouching is moderation. The perfect edit should be invisible since all people see is a nice portrait.
Why Photoshop Remains the Industry Standard
Despite the emergence of AI photo editor software, photo retouching through Photoshop has remained the king in the professional editing industry. The sophisticated features of Photoshop include its layering, masking, and precise adjustment options that make it possible for professionals to make improvements and maintain control of each one.
In contrast to the one-tap filters for smartphones, Photoshop allows photographers the freedom to retouch each individual section without over-editing, which makes skin appear natural despite the lighting and quality of the camera used.
The other notable feature is the non-destructive editing option.
Understanding the Best Skin Smoothing Tool in Photoshop
Choosing the correct skin smoothing tool depends on the type of portrait you’re editing. Photoshop provides several options, each designed for different levels of retouching.
Frequency Separation
Frequency Separation separates skin texture from colors, thus enabling editors to make the tones smooth without sacrificing natural pores. The technique is commonly applied in fashion photography since it creates natural-looking results that do not look too unnatural.
It offers great control when dealing with areas like blotchy cheeks and uneven tone on the forehead. The texture being intact helps to keep the natural look of portraits despite extensive retouching.
Healing Brush
The Healing Brush works perfectly for eliminating any imperfections, zits, and scratches from your skin prior to doing any skin-smoothing enhancements. Instead of hiding skin issues with blur, it cleverly blends the surrounding textures for seamless touch-ups.
Most professionals start with the healing brush because it takes much less work to smooth the skin afterward.
Clone Stamp
The Clone Stamp Tool provides full manual control in cases where auto-healing tools fail due to complex textures or lighting conditions. This tool enables users to duplicate pixels from neighboring areas.
It is a useful tool when working with complex skin problems since it helps in avoiding artifacts. However, this tool requires careful consideration.
Surface Blur
Surface Blur softens skin while preserving edges around important facial features such as the eyes, lips, eyebrows, and hairline. Although it can speed up editing, professionals usually apply it gently and combine it with layer masks to avoid an unnatural appearance.
Using a Face Smoother Tool vs Photoshop
Many newcomers try to find a simple way to smooth out faces with one click and without any editing knowledge. The popularity of mobile applications and automated image editors grows due to their fast performance.
Nevertheless, automatic methods usually apply equal smoothing to all regions, ignoring essential texture, which makes the image look unnatural. These methods cannot cope with difficult lighting and high resolution.
Photoshop is different since the editor can make his own decision about the place of applying changes. Instead of smoothening the whole face, he edits specific parts like cheeks, forehead, chin, and neck but leaves untouched such regions as eyes, lips, lashes, and facial hair.
It is the reason why Photo Retouching in Photoshop stays the best option for commercial photographs.
Step-by-Step: How to Smooth Skin in Photos Naturally
If you’re wondering how to smooth skin in photos, following a structured workflow produces the most realistic results.
Step 1: Duplicate the Original Layer
Always begin by duplicating your image layer. This protects the original photograph and allows you to compare edits throughout the process.
Working non-destructively also makes it easier to adjust opacity later if the effect becomes too strong.
Step 2: Remove Temporary Imperfections
Before beginning skin smoothing, eliminate acne, dust, scratches, and temporary blemishes using the Spot Healing Brush or Healing Brush.
Cleaning the skin first reduces the amount of smoothing required and helps preserve natural facial texture.
Step 3: Even Out Skin Tone
Use Frequency Separation or Dodge and Burn techniques to correct uneven lighting and color variations. Rather than hiding skin texture, these methods balance brightness and create smoother transitions across the face.
Professional editors spend significant time at this stage because lighting inconsistencies often appear more distracting than actual skin texture.
Step 4: Apply Controlled Skin Smoothing
Use your preferred skin smoothing tool to soften only the areas that need refinement. Avoid smoothing around eyelashes, eyebrows, lips, nostrils, and detailed facial features.
Keeping these elements sharp creates contrast that makes the portrait look realistic.
Step 5: Reduce Layer Opacity
After completing your edits, lower the layer opacity until the improvements blend naturally with the original image.
Many professionals intentionally reduce their adjustments because subtle edits usually produce the most believable results.
Common Mistakes Beginners Make
Over-Smoothing the Entire Face
Applying excessive blur across the entire portrait removes every pore and natural skin texture. Instead of creating flawless skin, this often results in an unrealistic plastic appearance that immediately reveals heavy editing.
Professional editors avoid this by applying selective adjustments only where needed, allowing important facial details to remain crisp and lifelike.
Ignoring Natural Lighting
Even perfectly smoothed skin can look artificial if the original lighting is uneven. Bright highlights, deep shadows, and color inconsistencies should be corrected before adding smoothing effects to achieve balanced and realistic portraits.
Paying attention to lighting ensures that the final image feels polished rather than heavily processed.
Editing at Low Zoom Levels
Many beginners perform all retouching while viewing the image at a distance. This makes it difficult to identify texture problems and often leads to inconsistent results across different areas of the face.
Experienced editors regularly zoom in for precision work and zoom out again to evaluate how the overall portrait appears to viewers.
Relying Only on AI
AI editors save time, but they cannot fully replace professional judgment. Automatic software often smooths eyebrows, eyelashes, lips, and facial edges that should remain sharp.
Combining AI assistance with manual refinement inside Photoshop produces significantly higher-quality results.
Best Situations for Skin Smoothing
Professional skin smoothing is useful across many photography genres.
- Fashion Photography: Models require polished skin while preserving realistic beauty details. Proper retouching enhances makeup and lighting without removing natural texture, resulting in editorial-quality images suitable for magazines and advertising campaigns.
- Wedding Photography: Couples expect timeless portraits that look elegant for years to come. Gentle skin smoothing removes temporary imperfections while keeping emotional expressions and authentic facial characteristics intact throughout the final album.
- Corporate Headshots: Business portraits should appear professional without looking overly edited. Subtle retouching helps create confidence by reducing distractions while maintaining a trustworthy and natural appearance for company profiles and branding.
- Social Media Content: Influencers and content creators often need consistent portrait quality across different platforms. Balanced skin smoothing improves image appeal while avoiding the unrealistic effects commonly associated with aggressive beauty filters.
Photoshop vs AI Skin Smoothing Apps
AI applications have transformed portrait editing by making retouching accessible to beginners. Most apps automatically detect faces, identify skin areas, and apply smoothing within seconds.
While these solutions are convenient, they often lack the flexibility needed for professional work. Photoshop offers complete control over every adjustment, enabling editors to customize the intensity, location, and style of retouching.
For commercial photography, advertising, magazines, and premium portrait sessions, photo retouching in Photoshop consistently delivers superior quality because every correction is intentional rather than automated.
Tips for Realistic Portrait Retouching
Successful photo retouching in Photoshop focuses on enhancing rather than transforming the subject. Skin should still contain natural pores, fine lines, and subtle texture that make the portrait believable.
Retouching should also complement lighting instead of fighting against it. When highlights, shadows, and skin tones remain balanced, smoothing appears almost invisible to viewers.
Finally, compare your edited image with the original frequently. If the changes immediately stand out, consider reducing the strength of your adjustments until the improvements feel natural.
Final Thoughts
Photo retouching in Photoshop requires a lot of effort and patience. In spite of the development of automatic filters and other AI-based systems, their results often do not reach the accuracy and realism delivered via professional Photoshop methods.
It does not matter whether you are using any special skin smoothing tool, trying out the face smoother tool, learning how to smooth skin in pictures, or just working on your portrait editing skillset – it should be kept in mind that the goal is to enhance, not to make things perfect.
The natural skin always has texture, personality, and character, so it should be taken into consideration when editing.